Creating & Managing Permits in the Offstreet Dashboard
Offstreet is transitioning from Registrations to Permits. As part of this update, some names, screens, and actions in the Dashboard will look different.
The overall workflow remains familiar: you can still create parking access for a vehicle, view existing permits, update or cancel Upcoming permits, and send confirmation emails.
What’s Changing?
Here are the key terminology changes to be aware of:
Creating a Permit
Previously: Create Registration
Previously, you may have used Permits → Create Registration to create a parking registration.
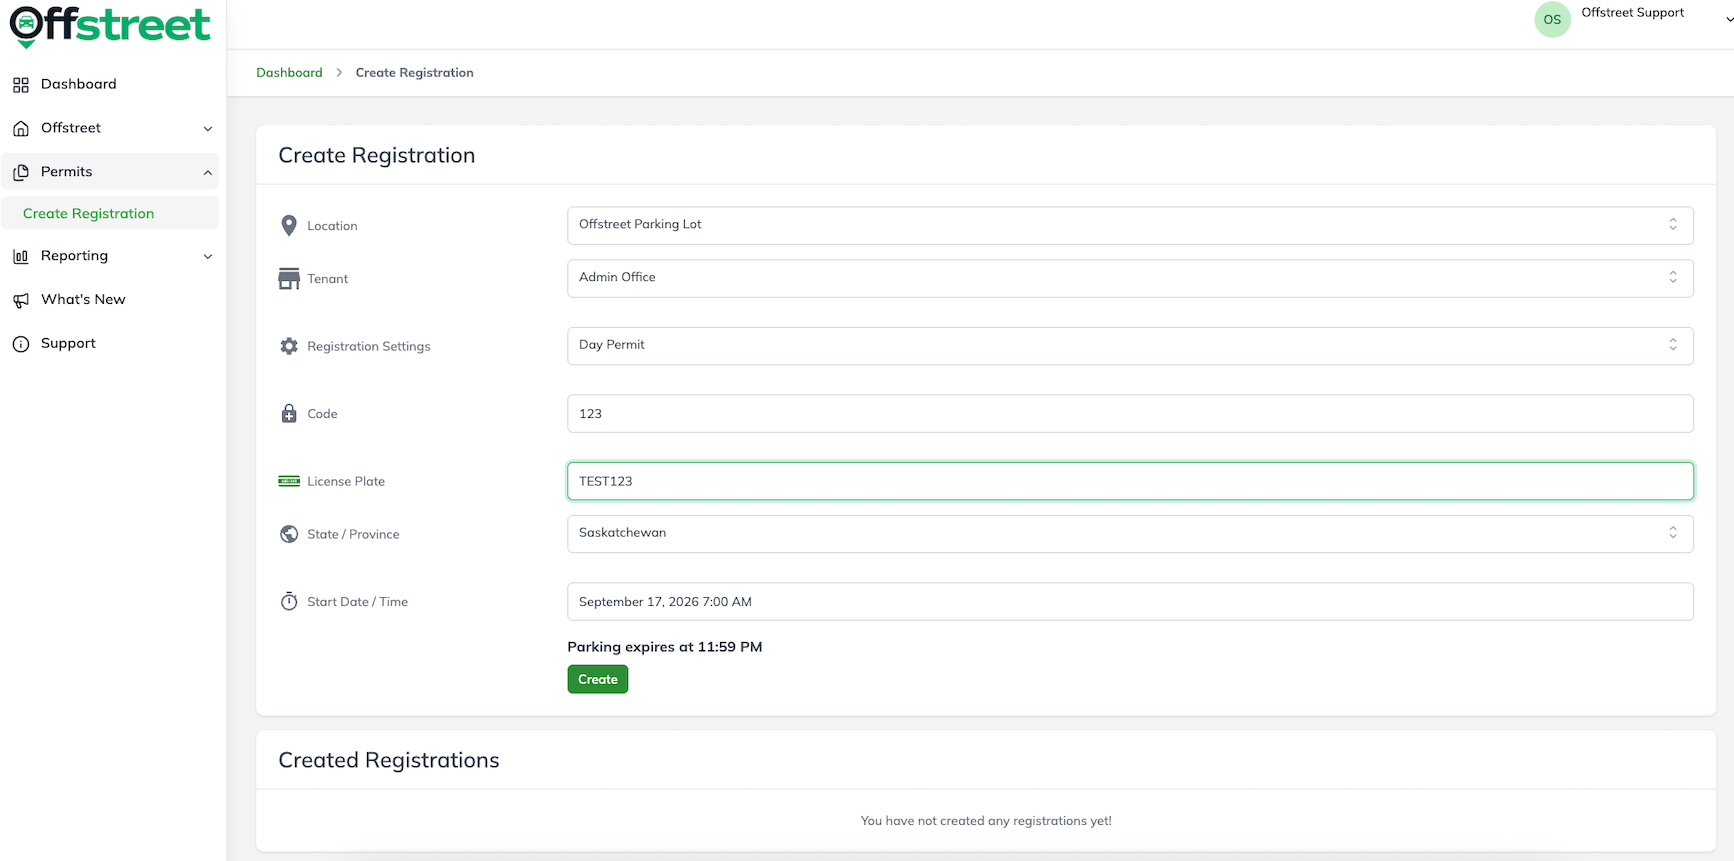
Create Permit
This is now Permits → Create Permit.
The screen has been updated, but the general process remains the same.
- From the Dashboard, open Permits → Create Permit.
- If you have access to more than one Permit Type (previously Registration Setting), select the appropriate Permit Type. If you only have access to one, it will already be selected.
- Select your Tenant, if applicable.
- Review the available Parking Option and enter or select the applicable parking dates/times.
- Enter the vehicle's License Plate and State/Province.
- Enter a Code, Notes, or other Additional Information if required.
- Click Create.
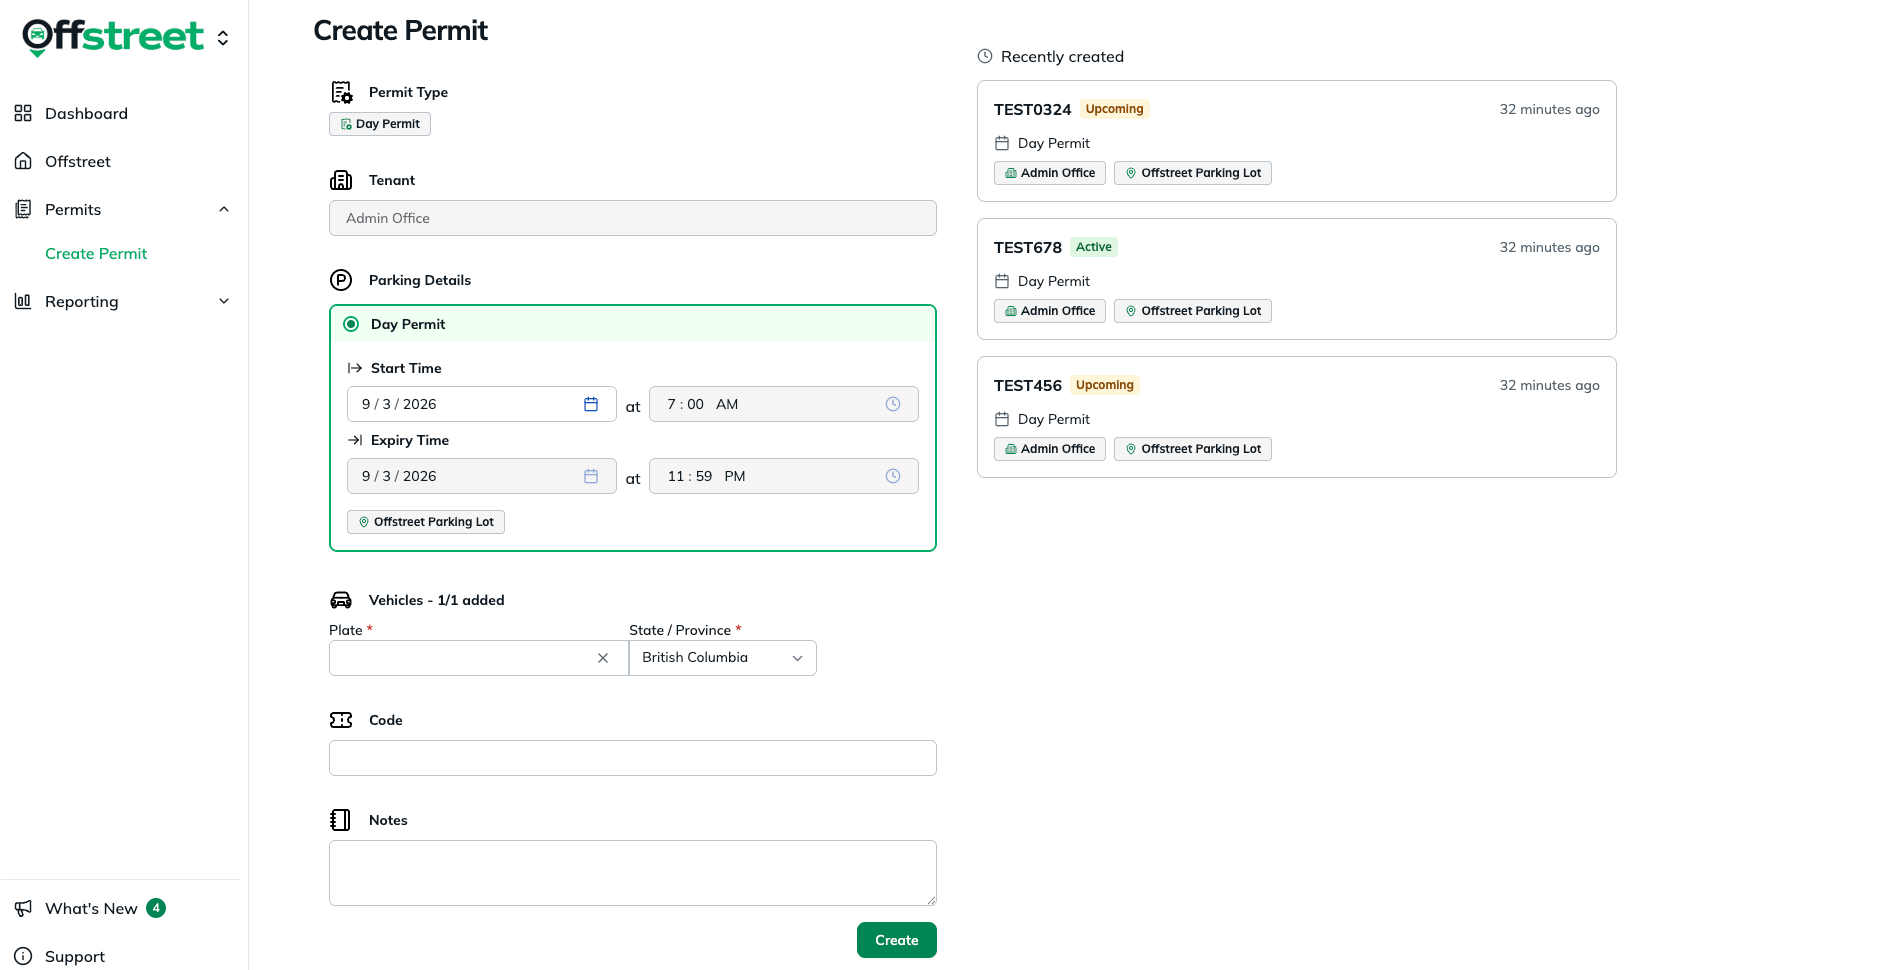
Once created, the permit will appear under Recently created on the right side of the page.
Viewing Permits
Previously: View a Registration
With Registrations, opening a registration took you to a separate Registration Details page.
You could get there in two ways:
- Immediately after creating a registration by selecting View Registration.
- By using Vehicle Lookup to search for a vehicle and selecting its registration.
In both cases, you would leave the page you were working on and be taken to the Registration Details page.
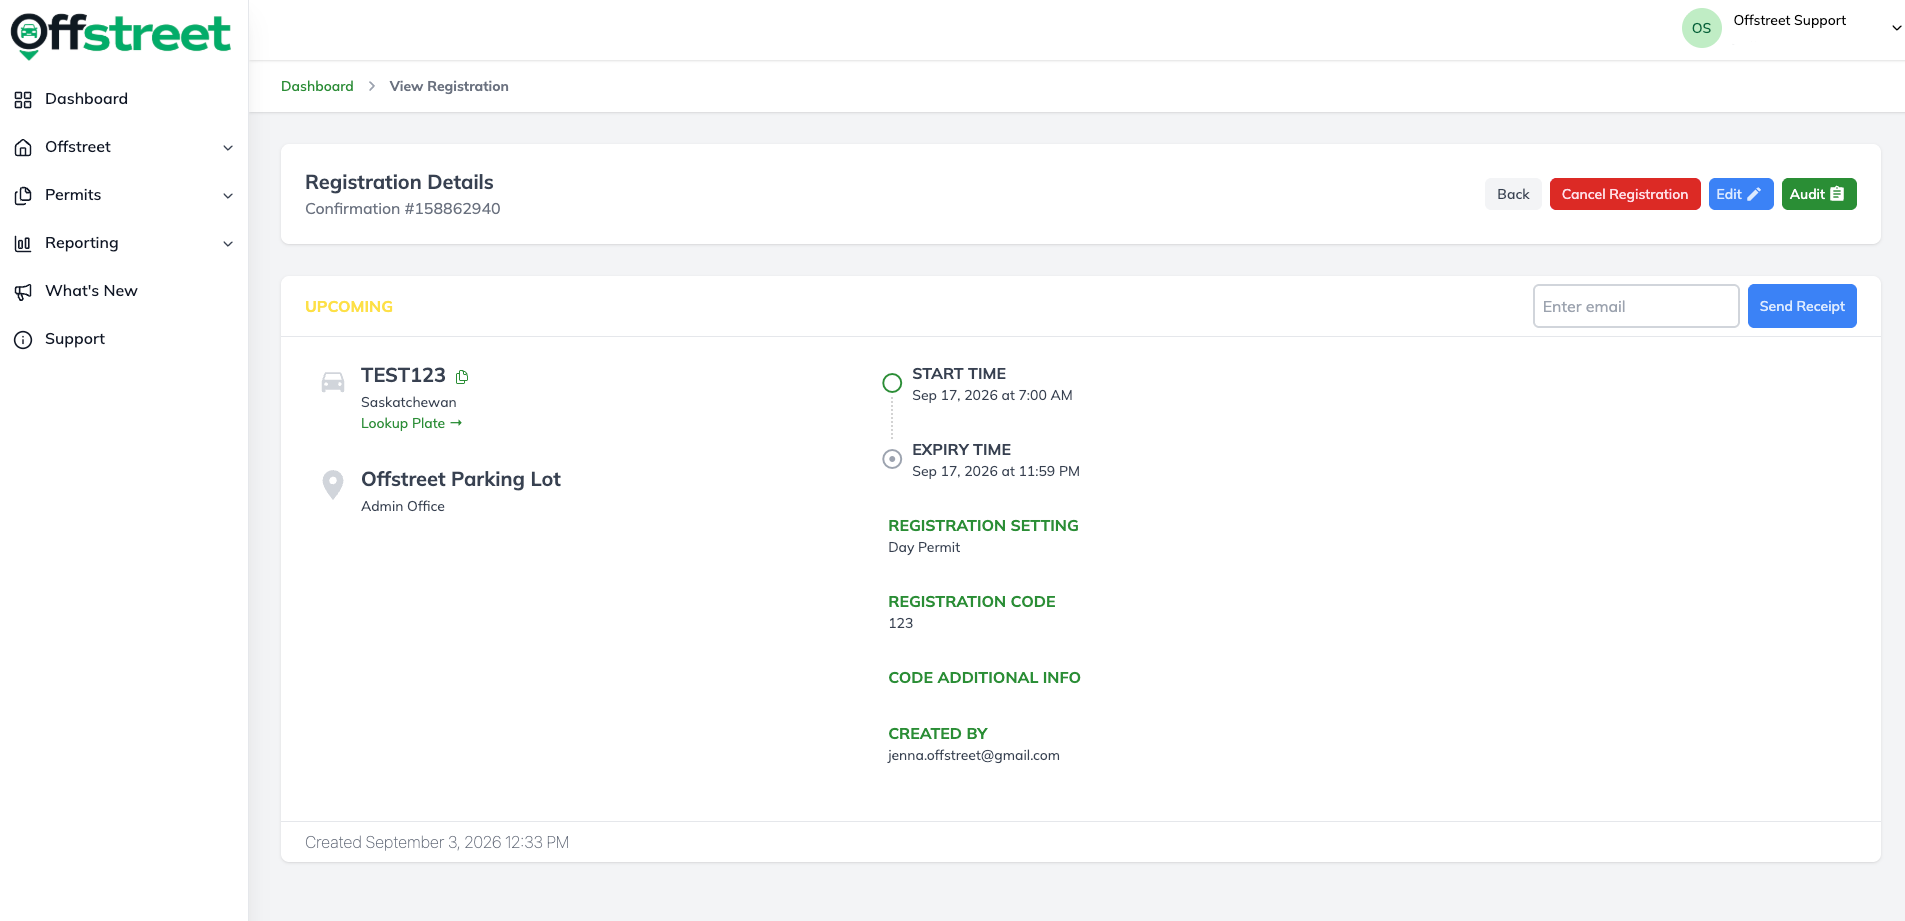
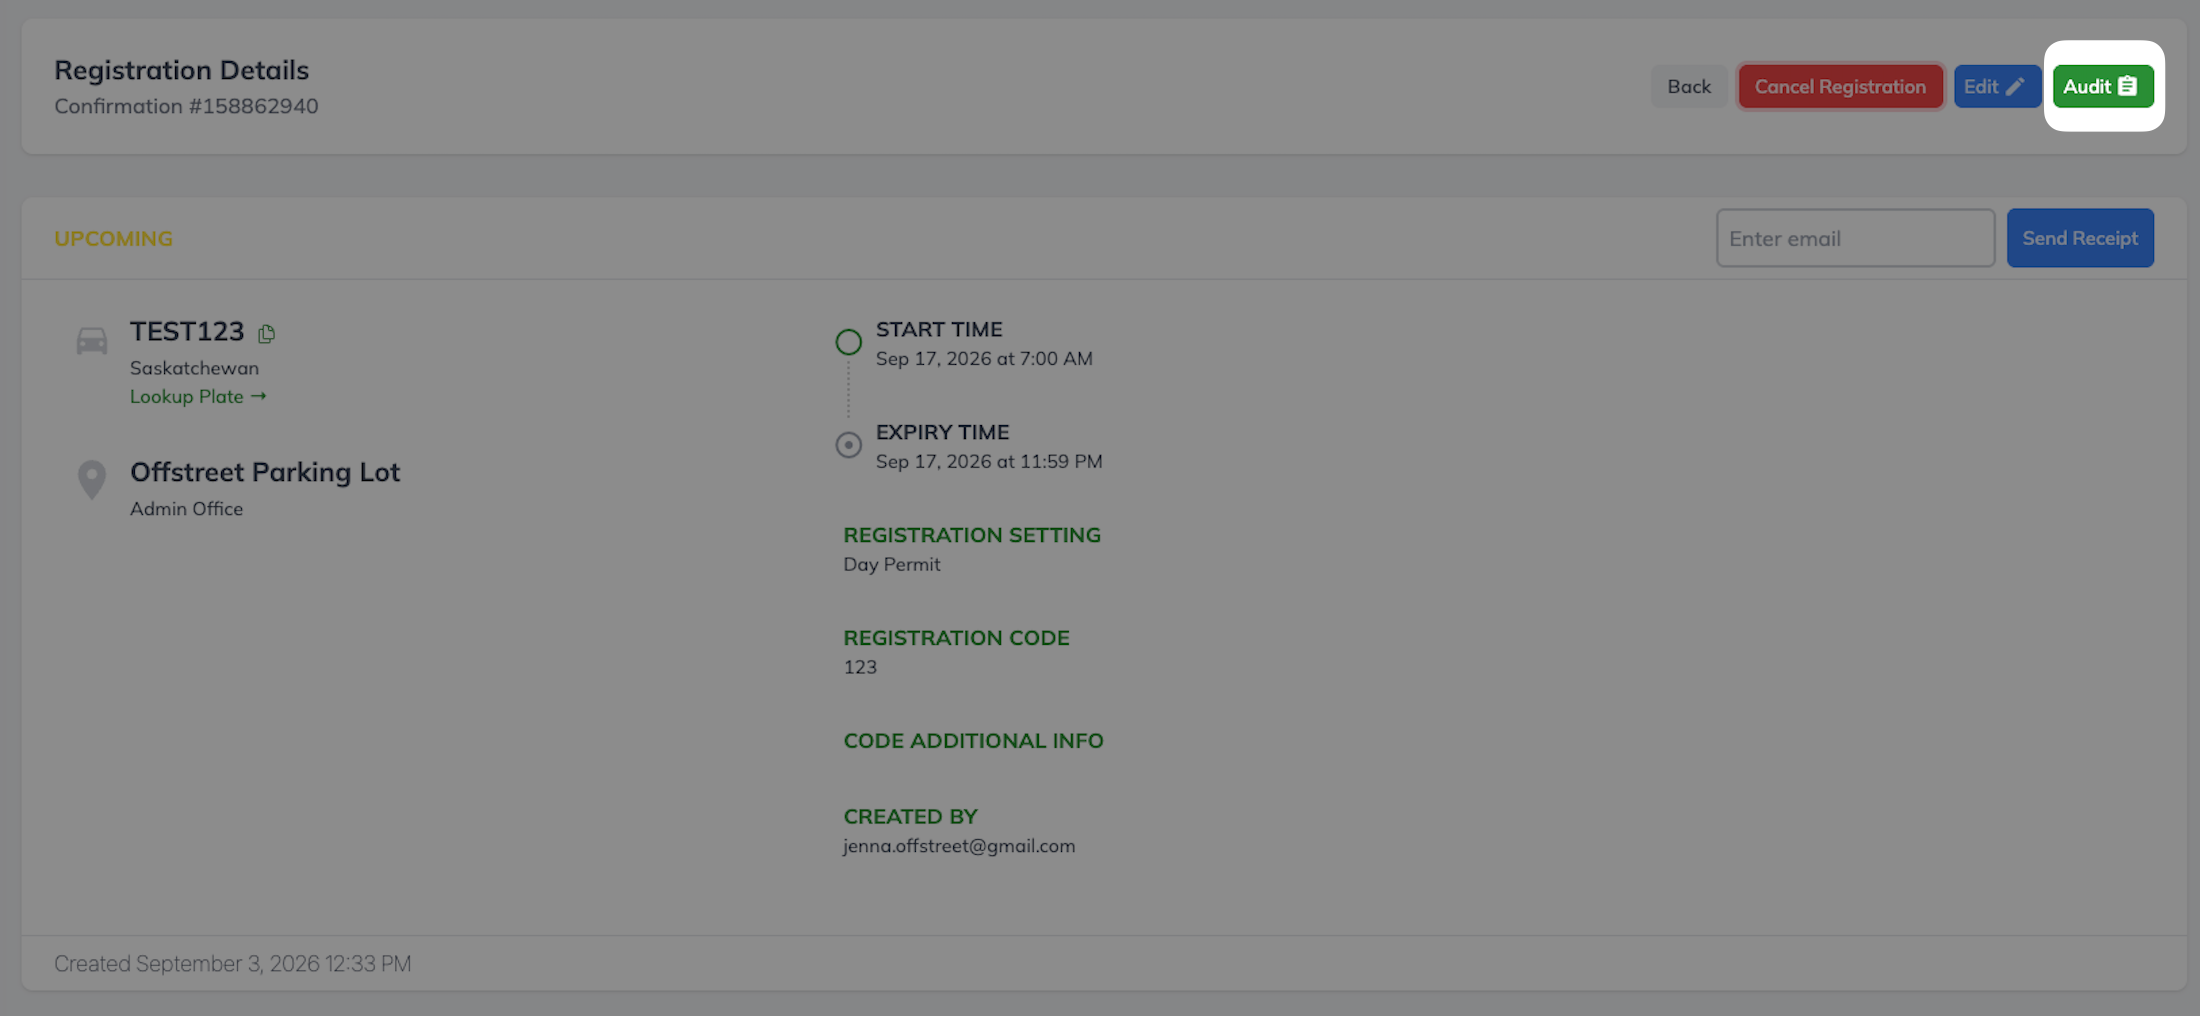
From this page, you could review the registration details and access actions such as Edit, Cancel Registration, Send Receipt, and Audit.
Now: View a Permit
With Permits, you no longer need to navigate to a separate details page. Selecting a permit opens the View Permit panel on the right side of your current screen.
You can open a permit by:
- Selecting it from Recently Created after creating a permit.
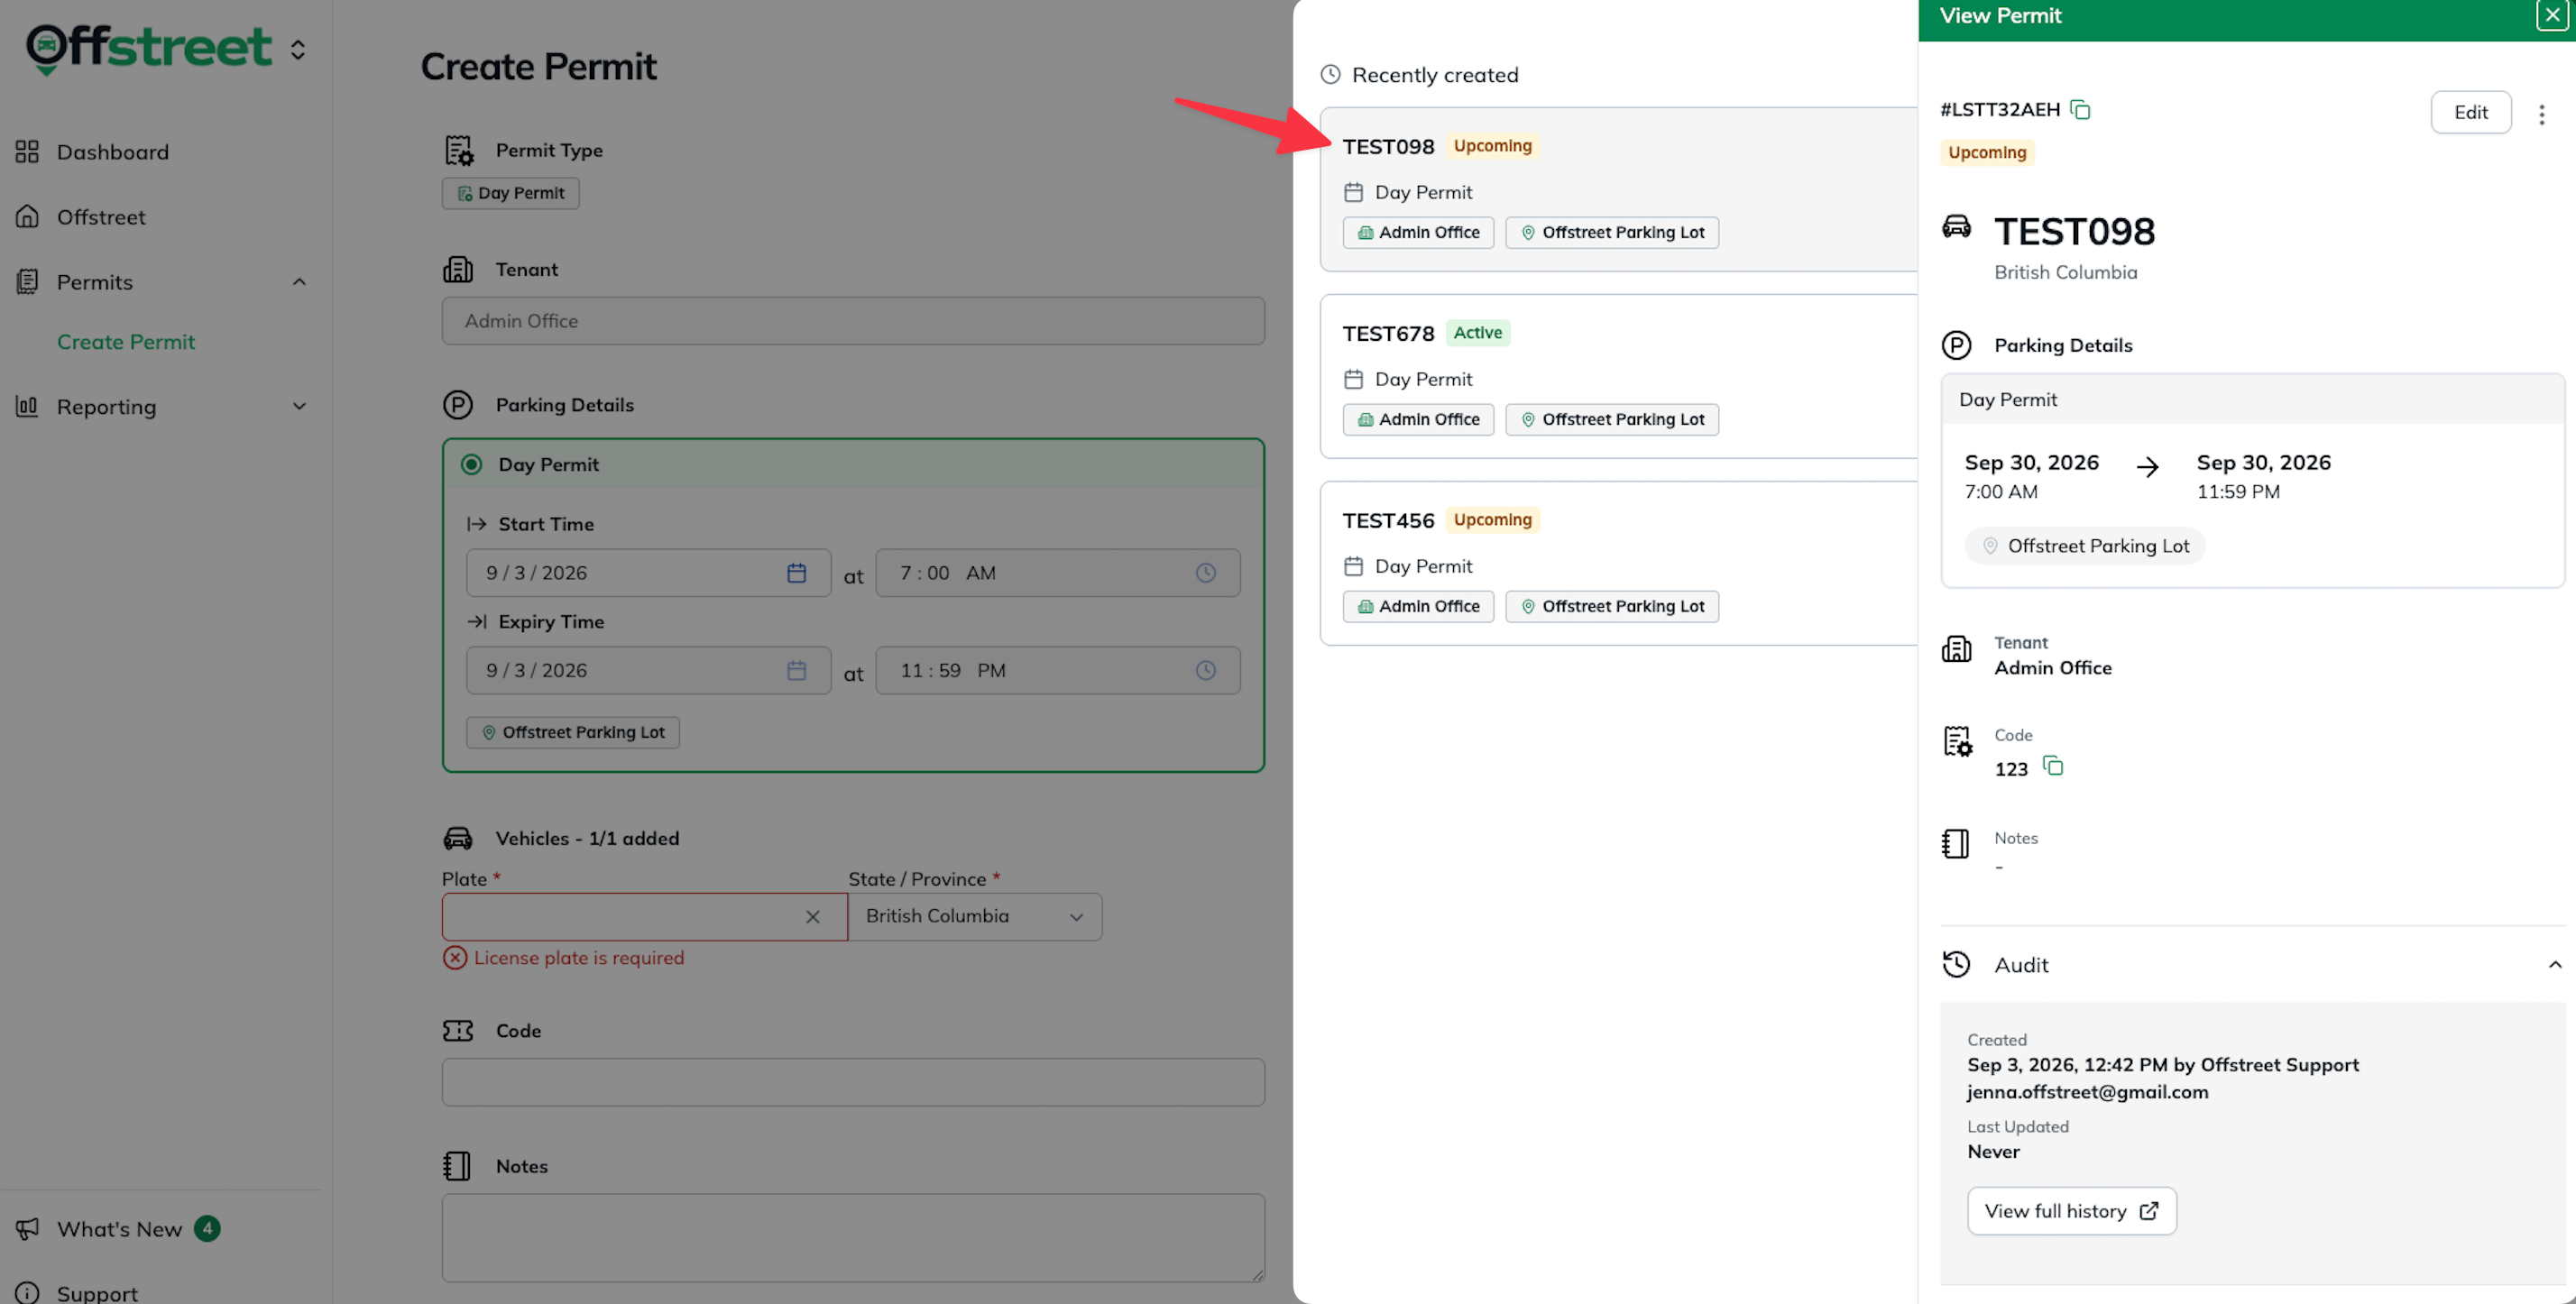
- Searching for the vehicle through Vehicle Lookup or Active Vehicles and selecting the permit.
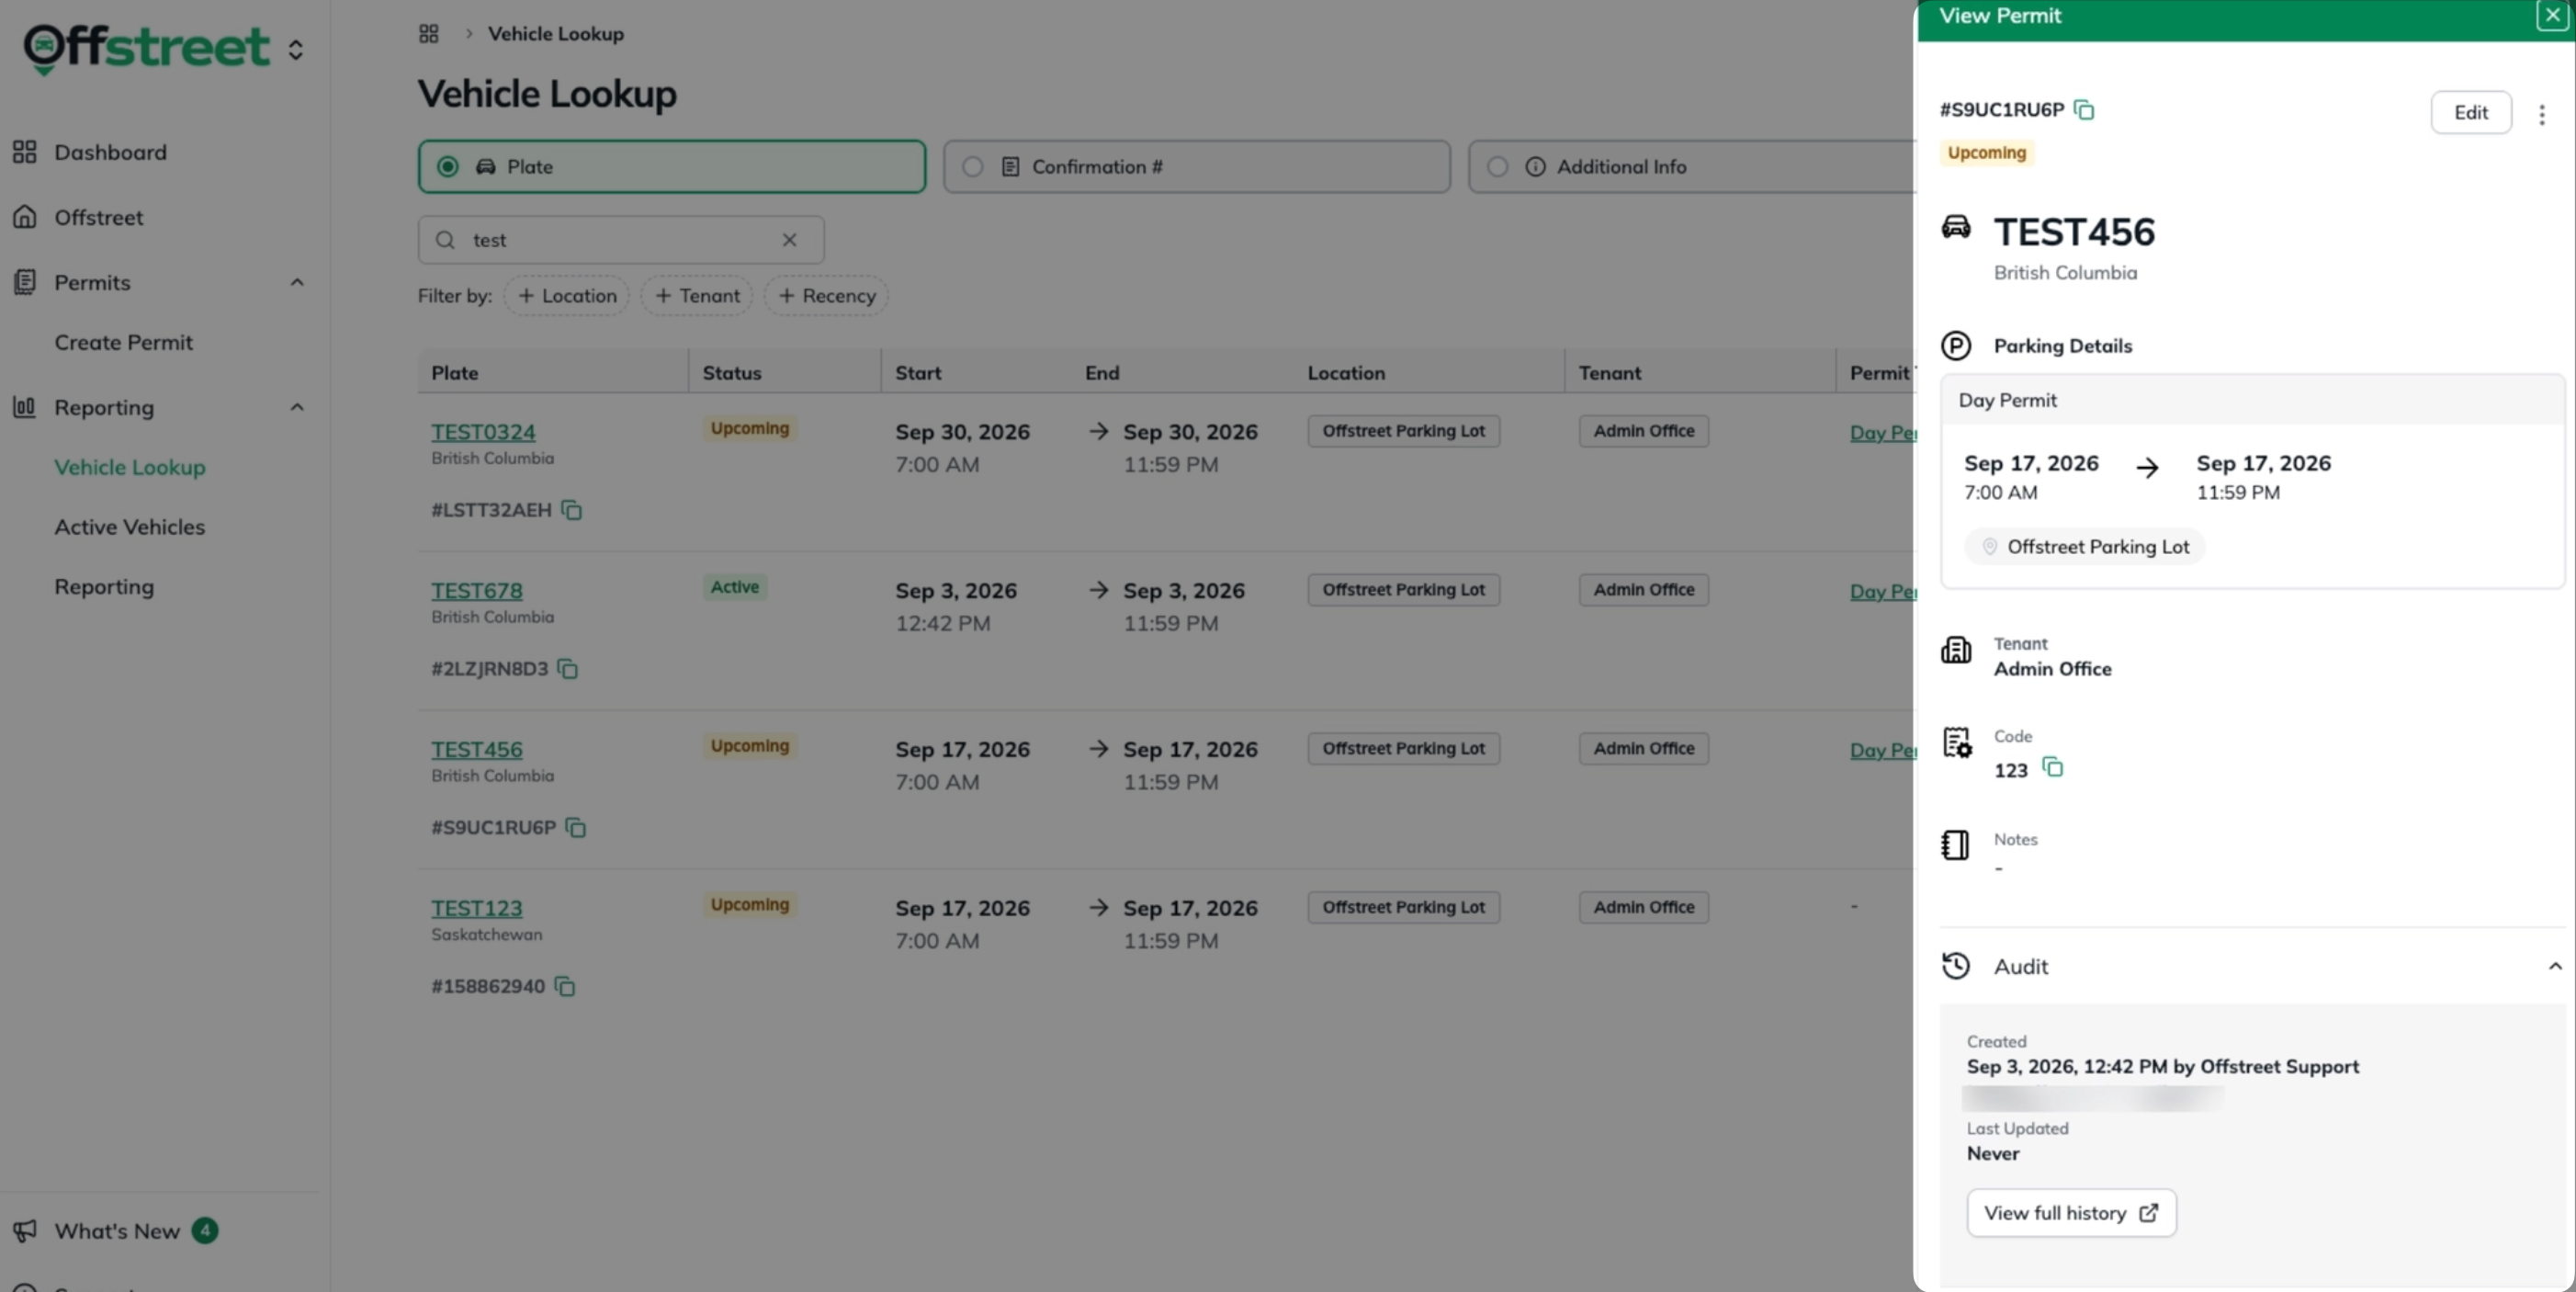
The permit opens on the right side of your current screen, allowing you to review its details and take available actions without leaving the page you were working on.
Editing a Permit
You can continue to update an Upcoming permit using Edit, just as you did with Registrations. The main difference is that editing now happens in a side panel instead of taking you to a separate page.
Previously: Editing a Registration
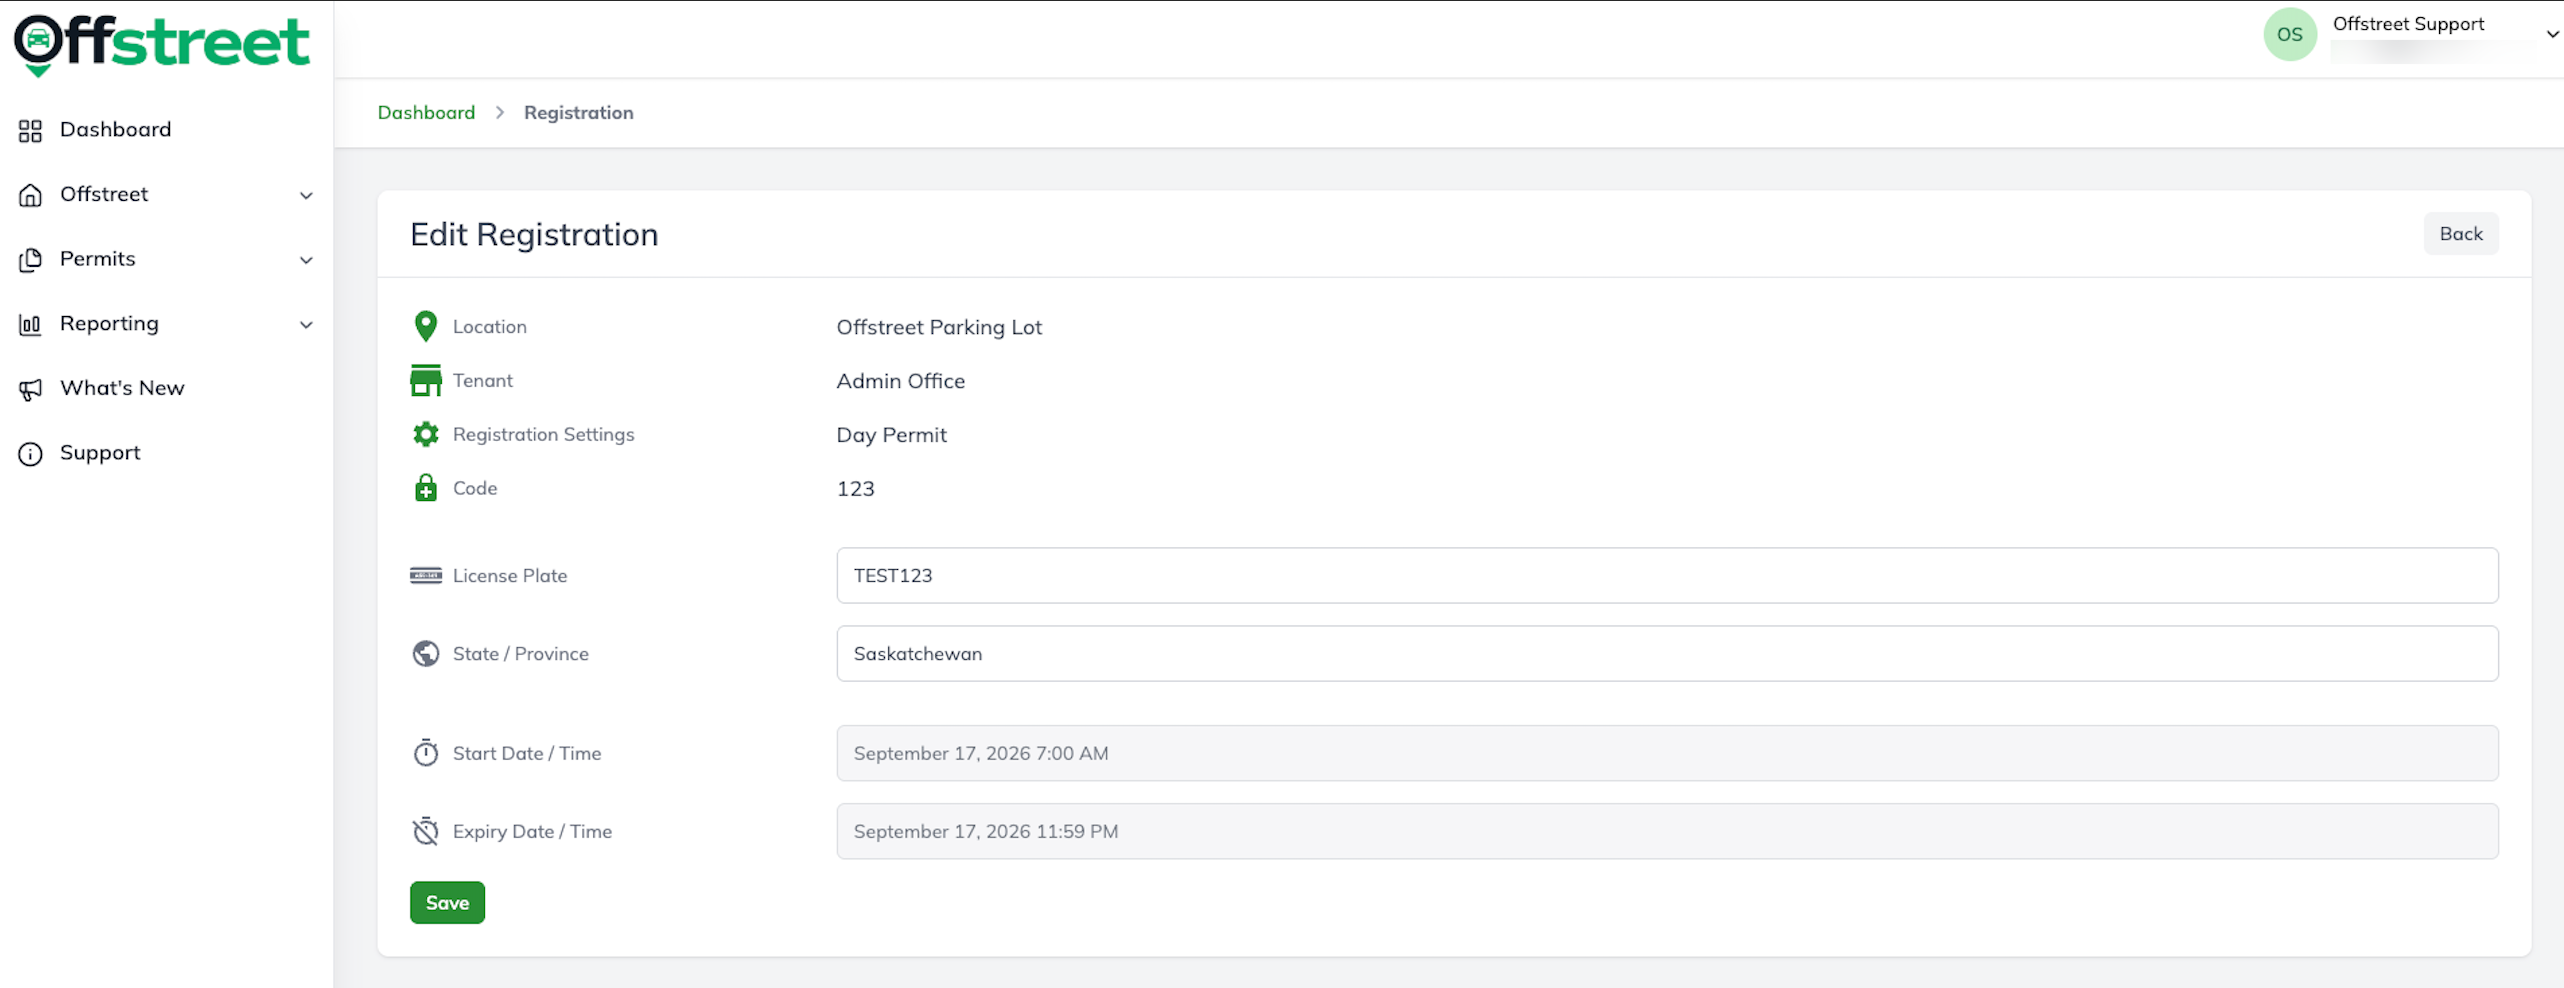
With Registrations, selecting Edit took you away from the Registration Details page and opened a separate Edit Registration page.
From there, you could update the available information, such as the vehicle's license plate, and save your changes.
Now: Editing a Permit
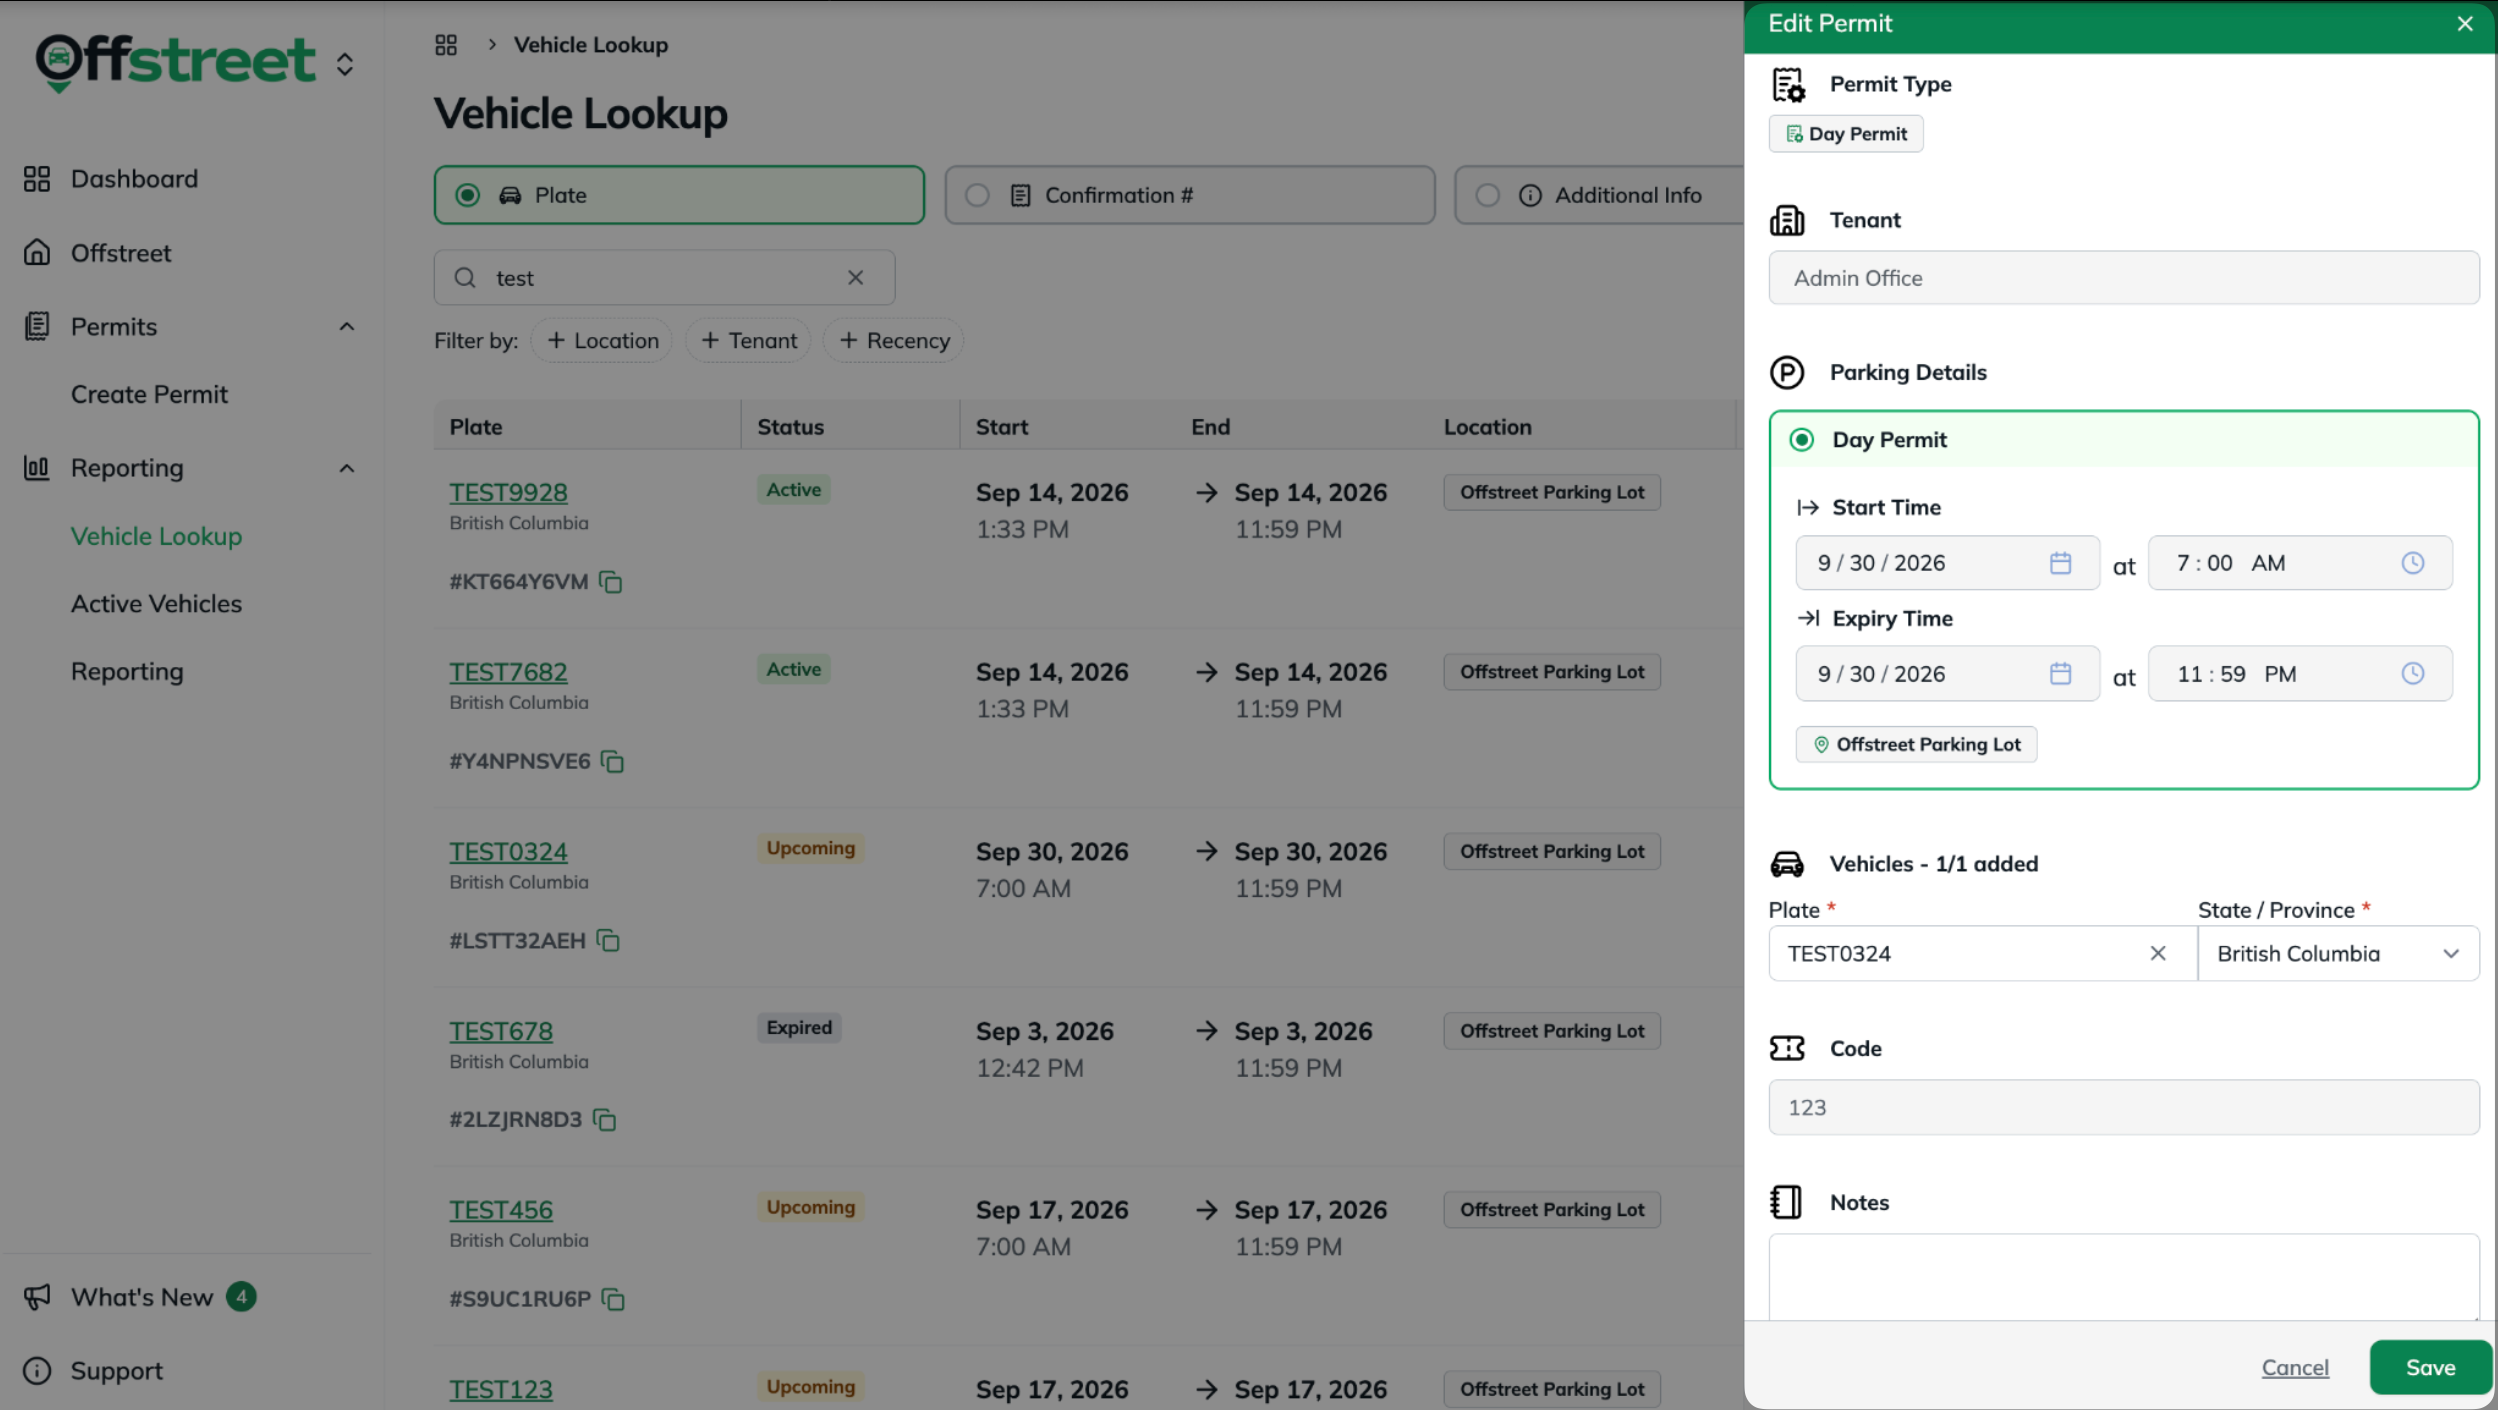
With Permits, you can make changes without leaving the page you're working on.
- Open the permit and click Edit in the top-right corner of the View Permit panel.
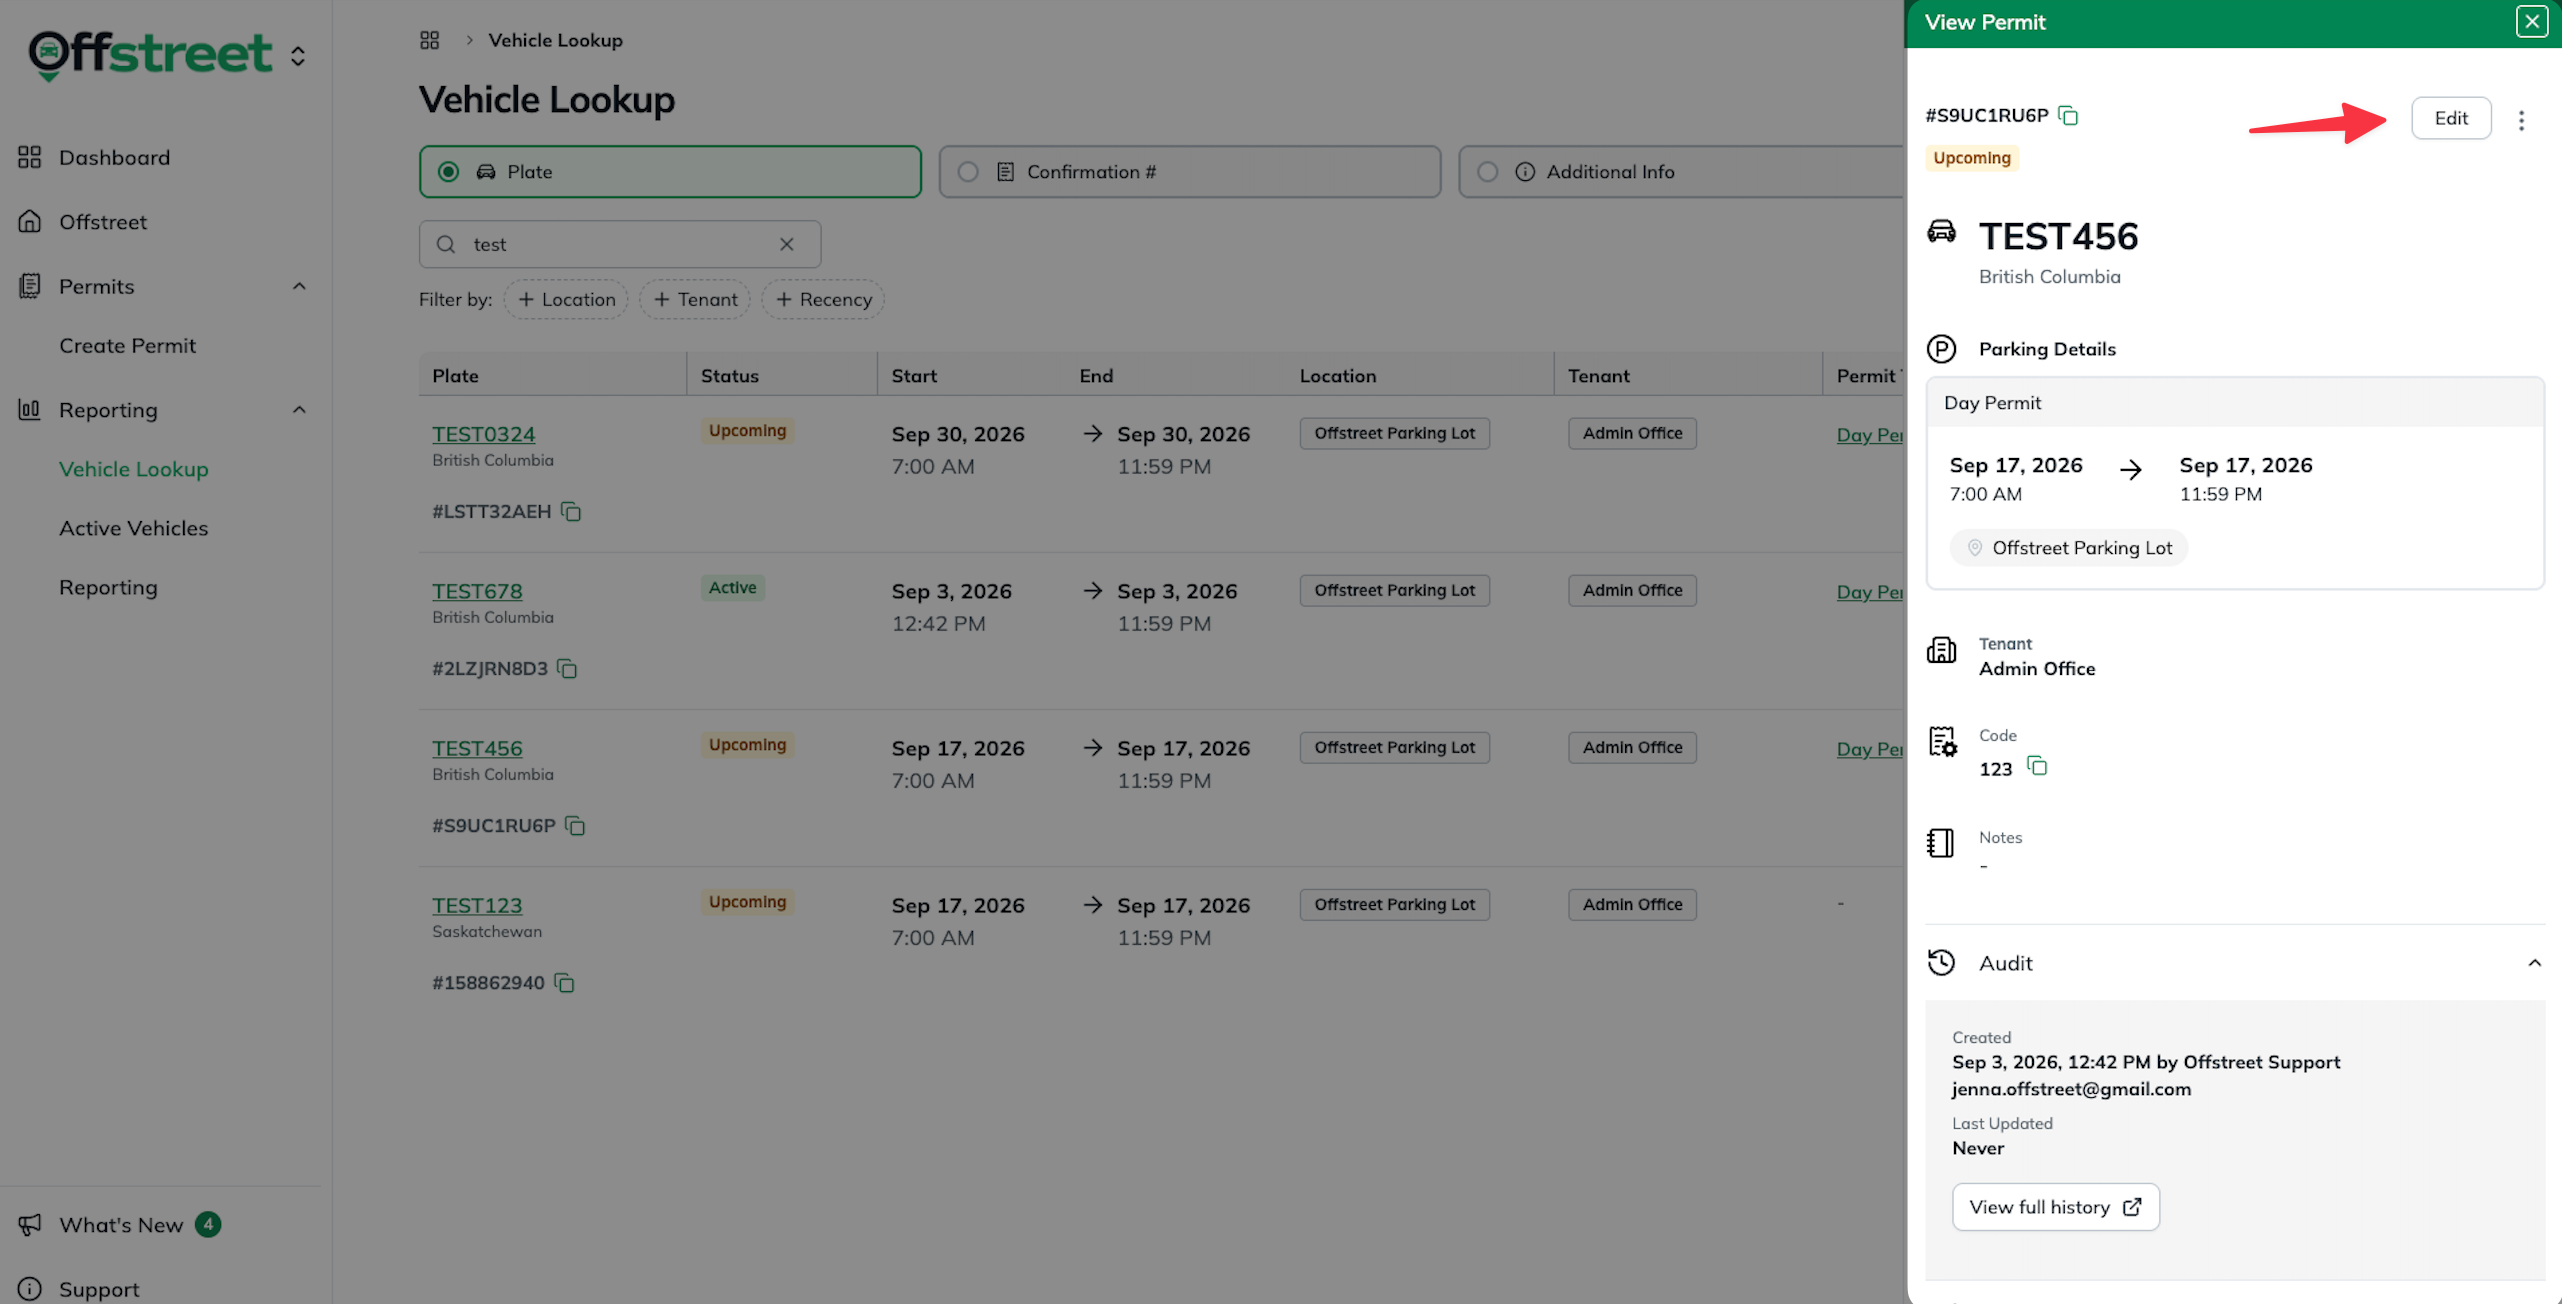
- The Edit Permit panel will open on the right side of your current page.
- Update the license plate or other available information.
- Click Save.
Cancelling an Upcoming Permit
Cancelling a Registration
Previously, an Upcoming Registration could be cancelled using the Cancel Registration button on the Registration Details page.
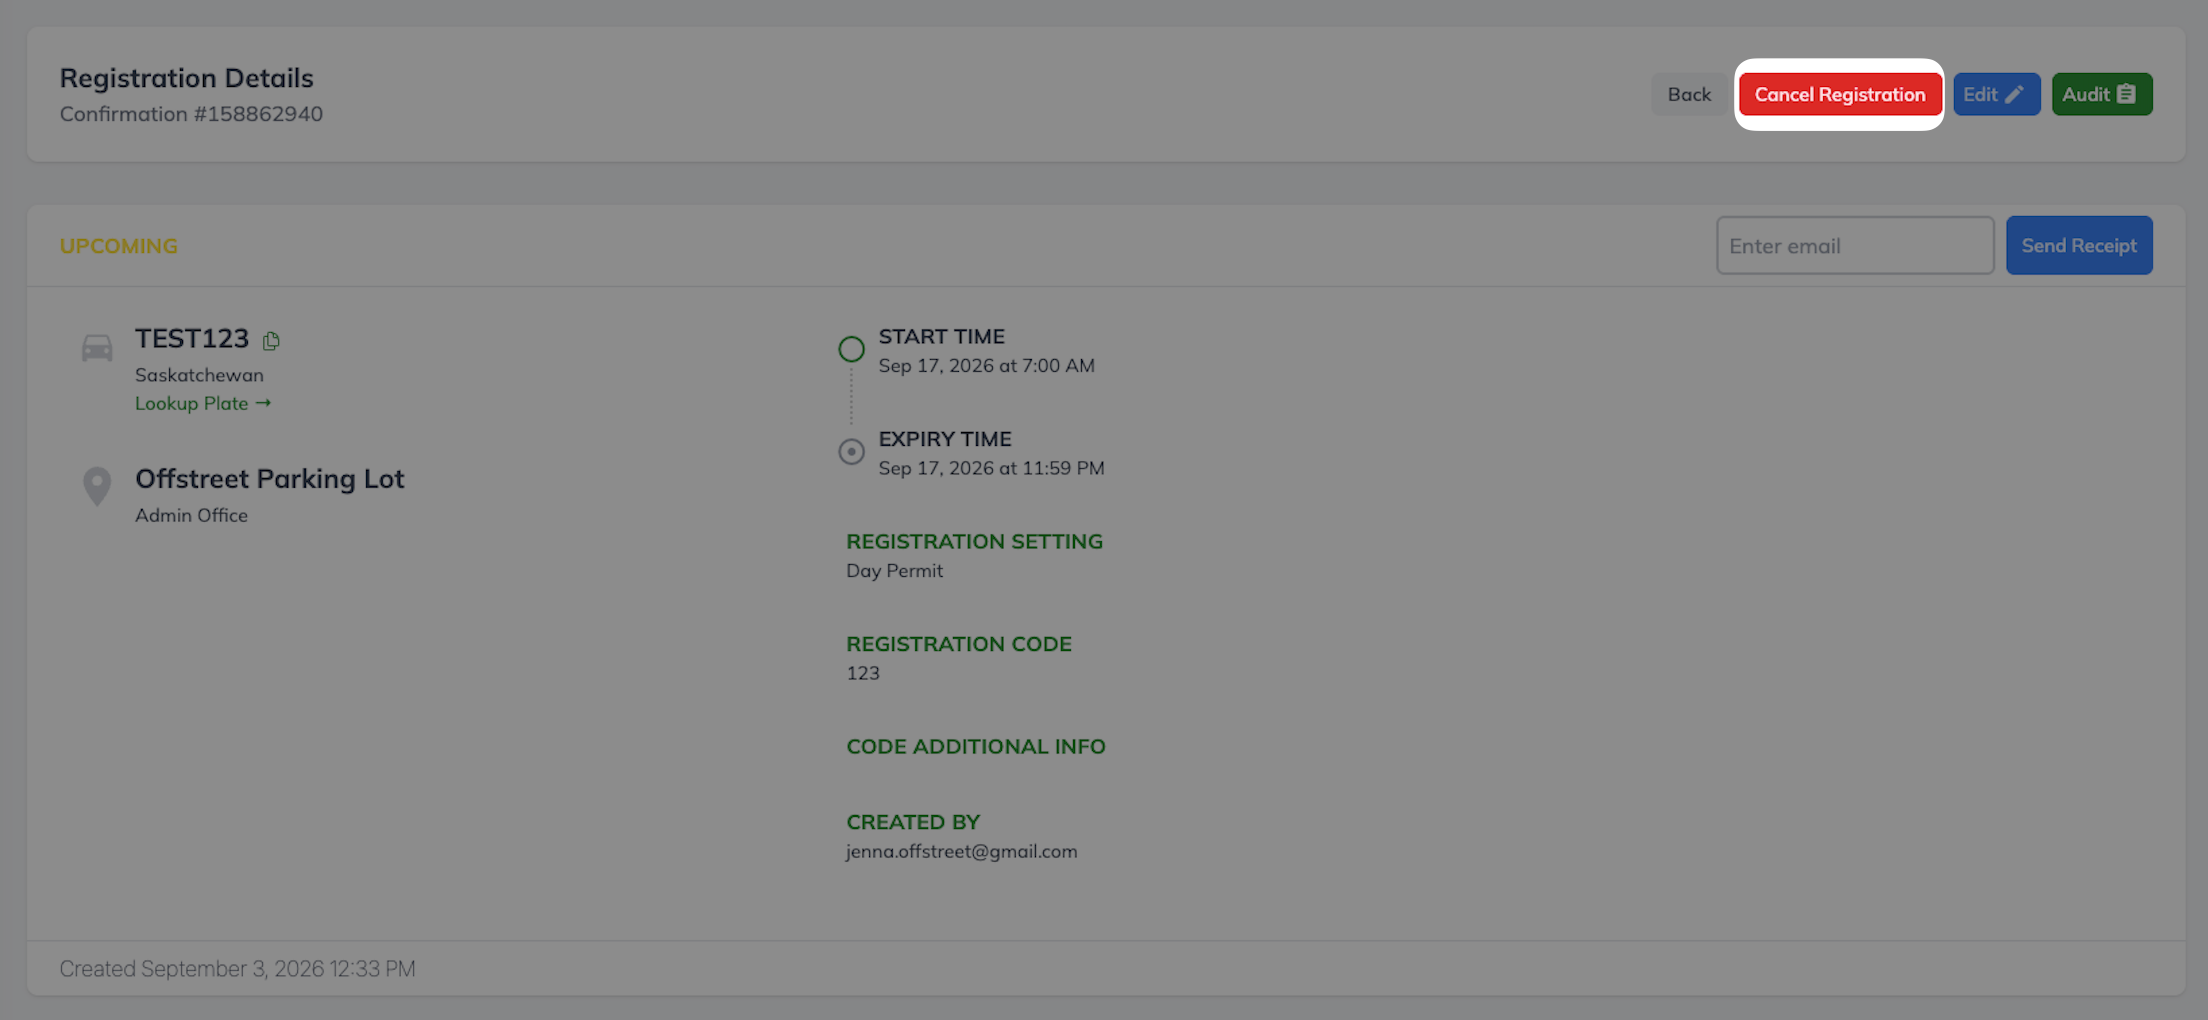
For Permits, this action is now called Delete.
To cancel an Upcoming Permit:
- Open the permit.
- Click the three-dot menu (⋮) in the upper-right corner.
- Select Delete.
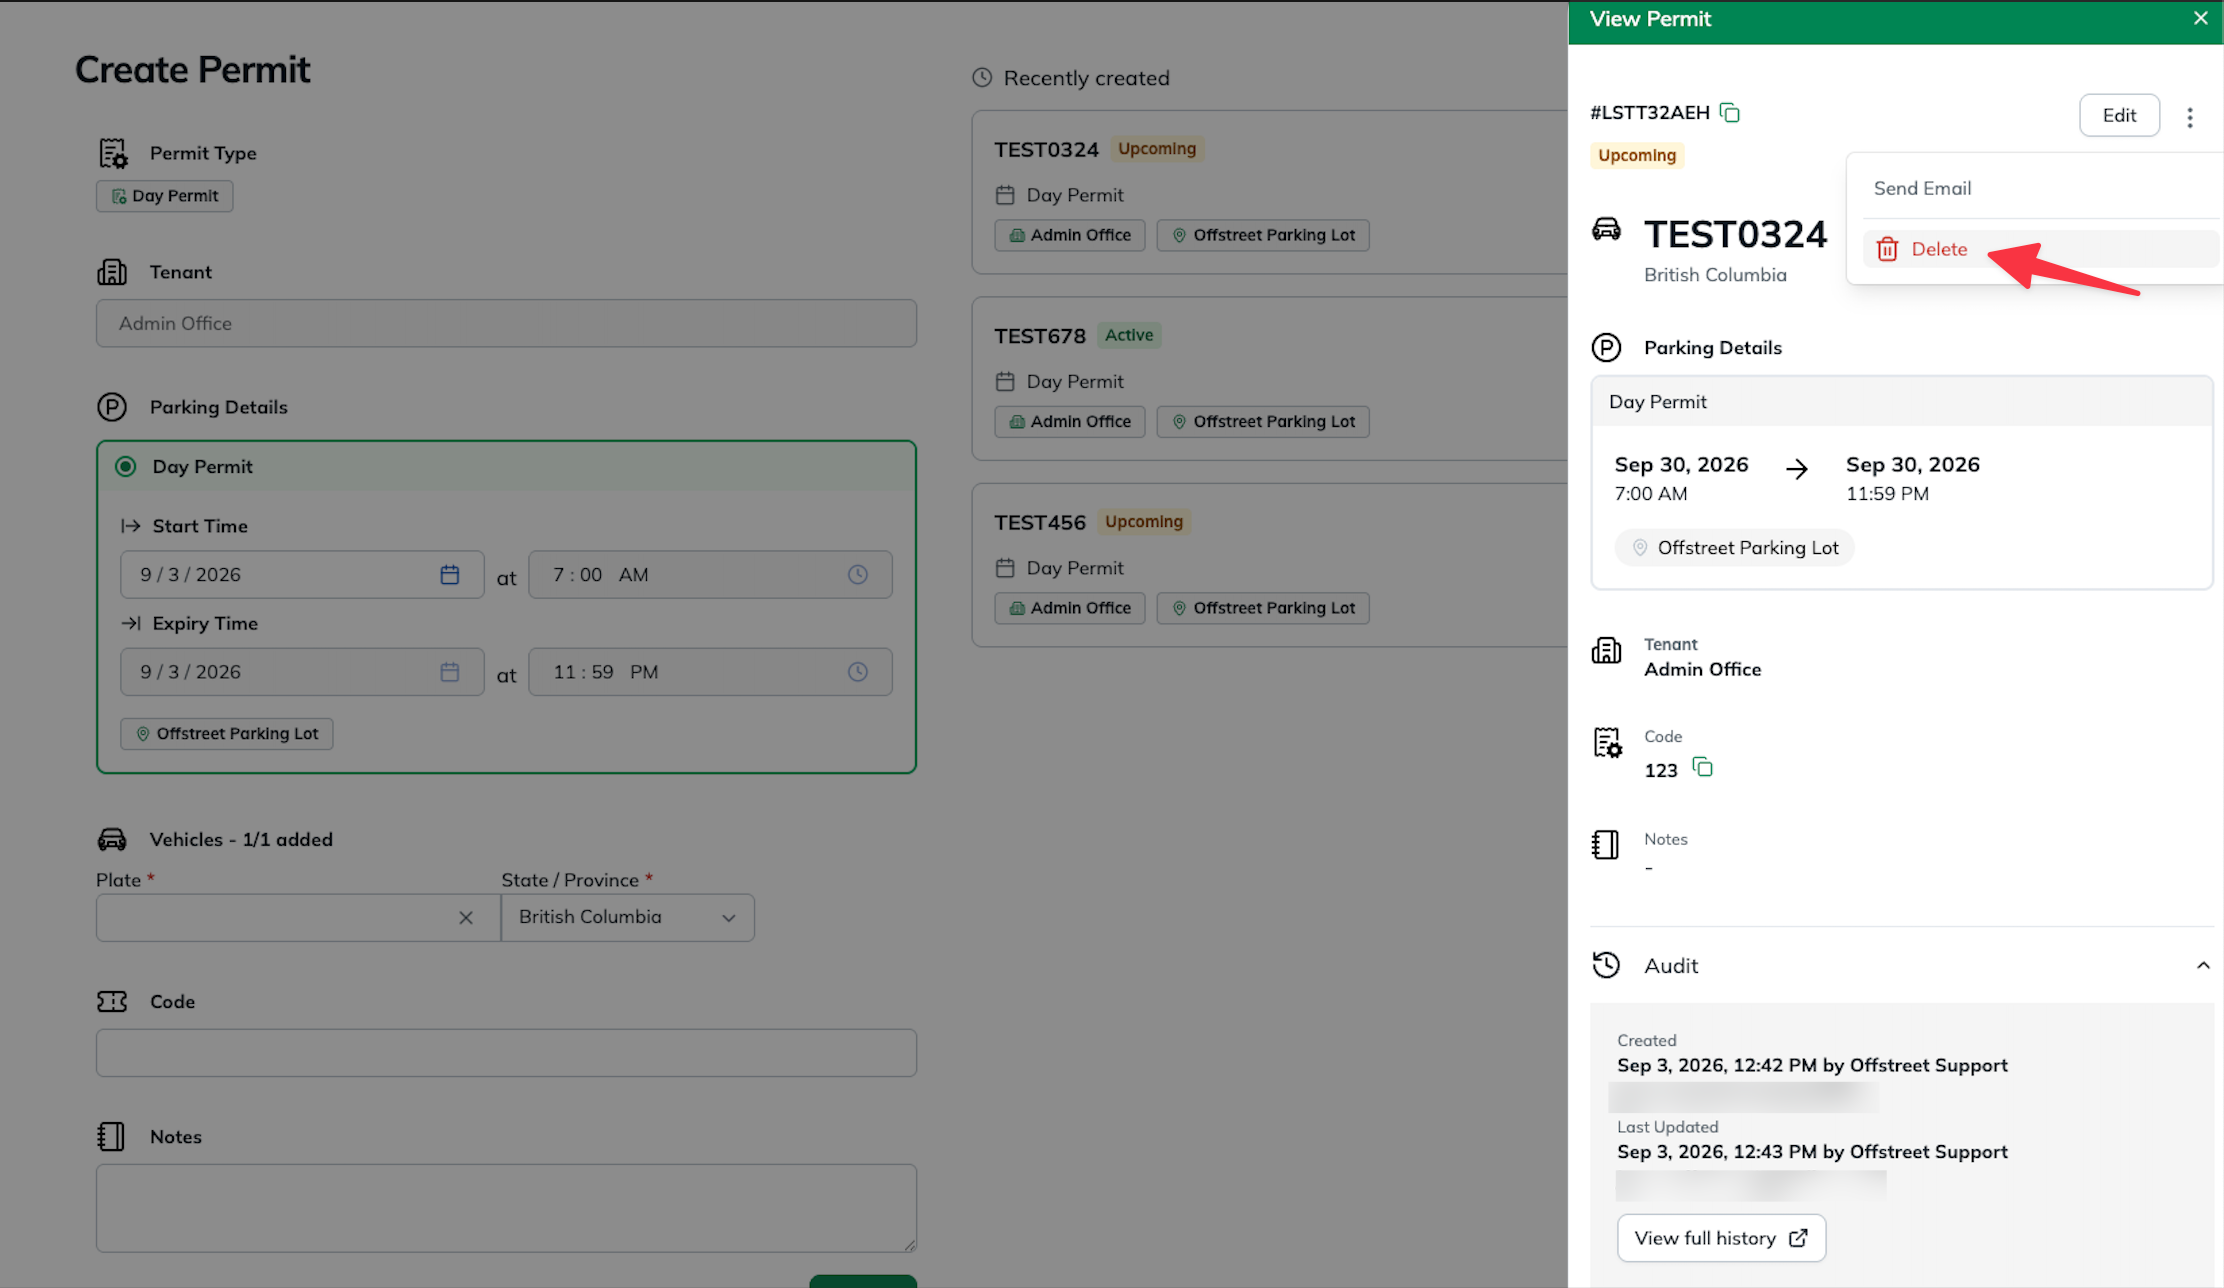
This removes the upcoming permit so it is no longer valid for parking.
Sending a Confirmation Email
Sending a Registration Receipt
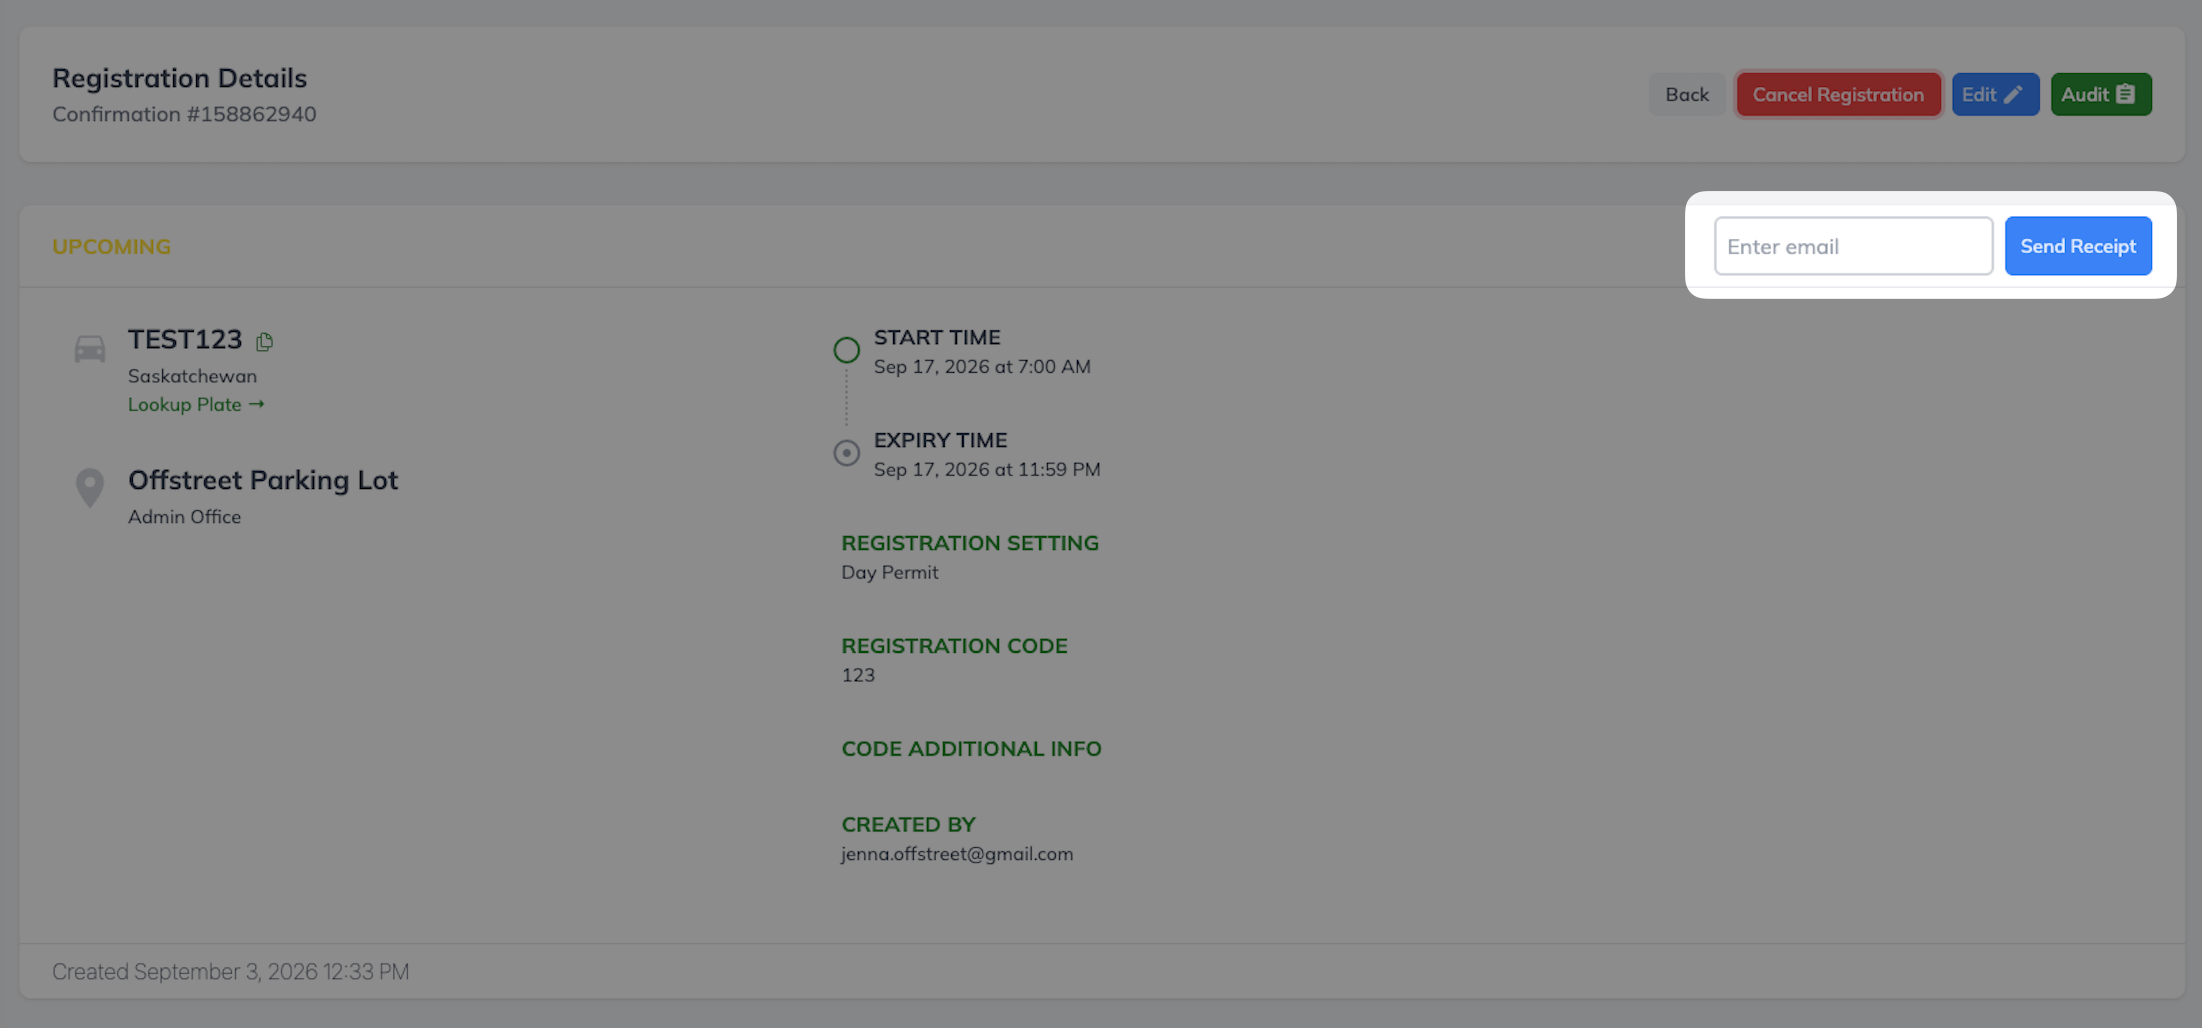
With Registrations, the Registration Details page included a Send Receipt option. You could enter an email address and send the registration confirmation to the permit holder.
Now: Sending a Permit Confirmation
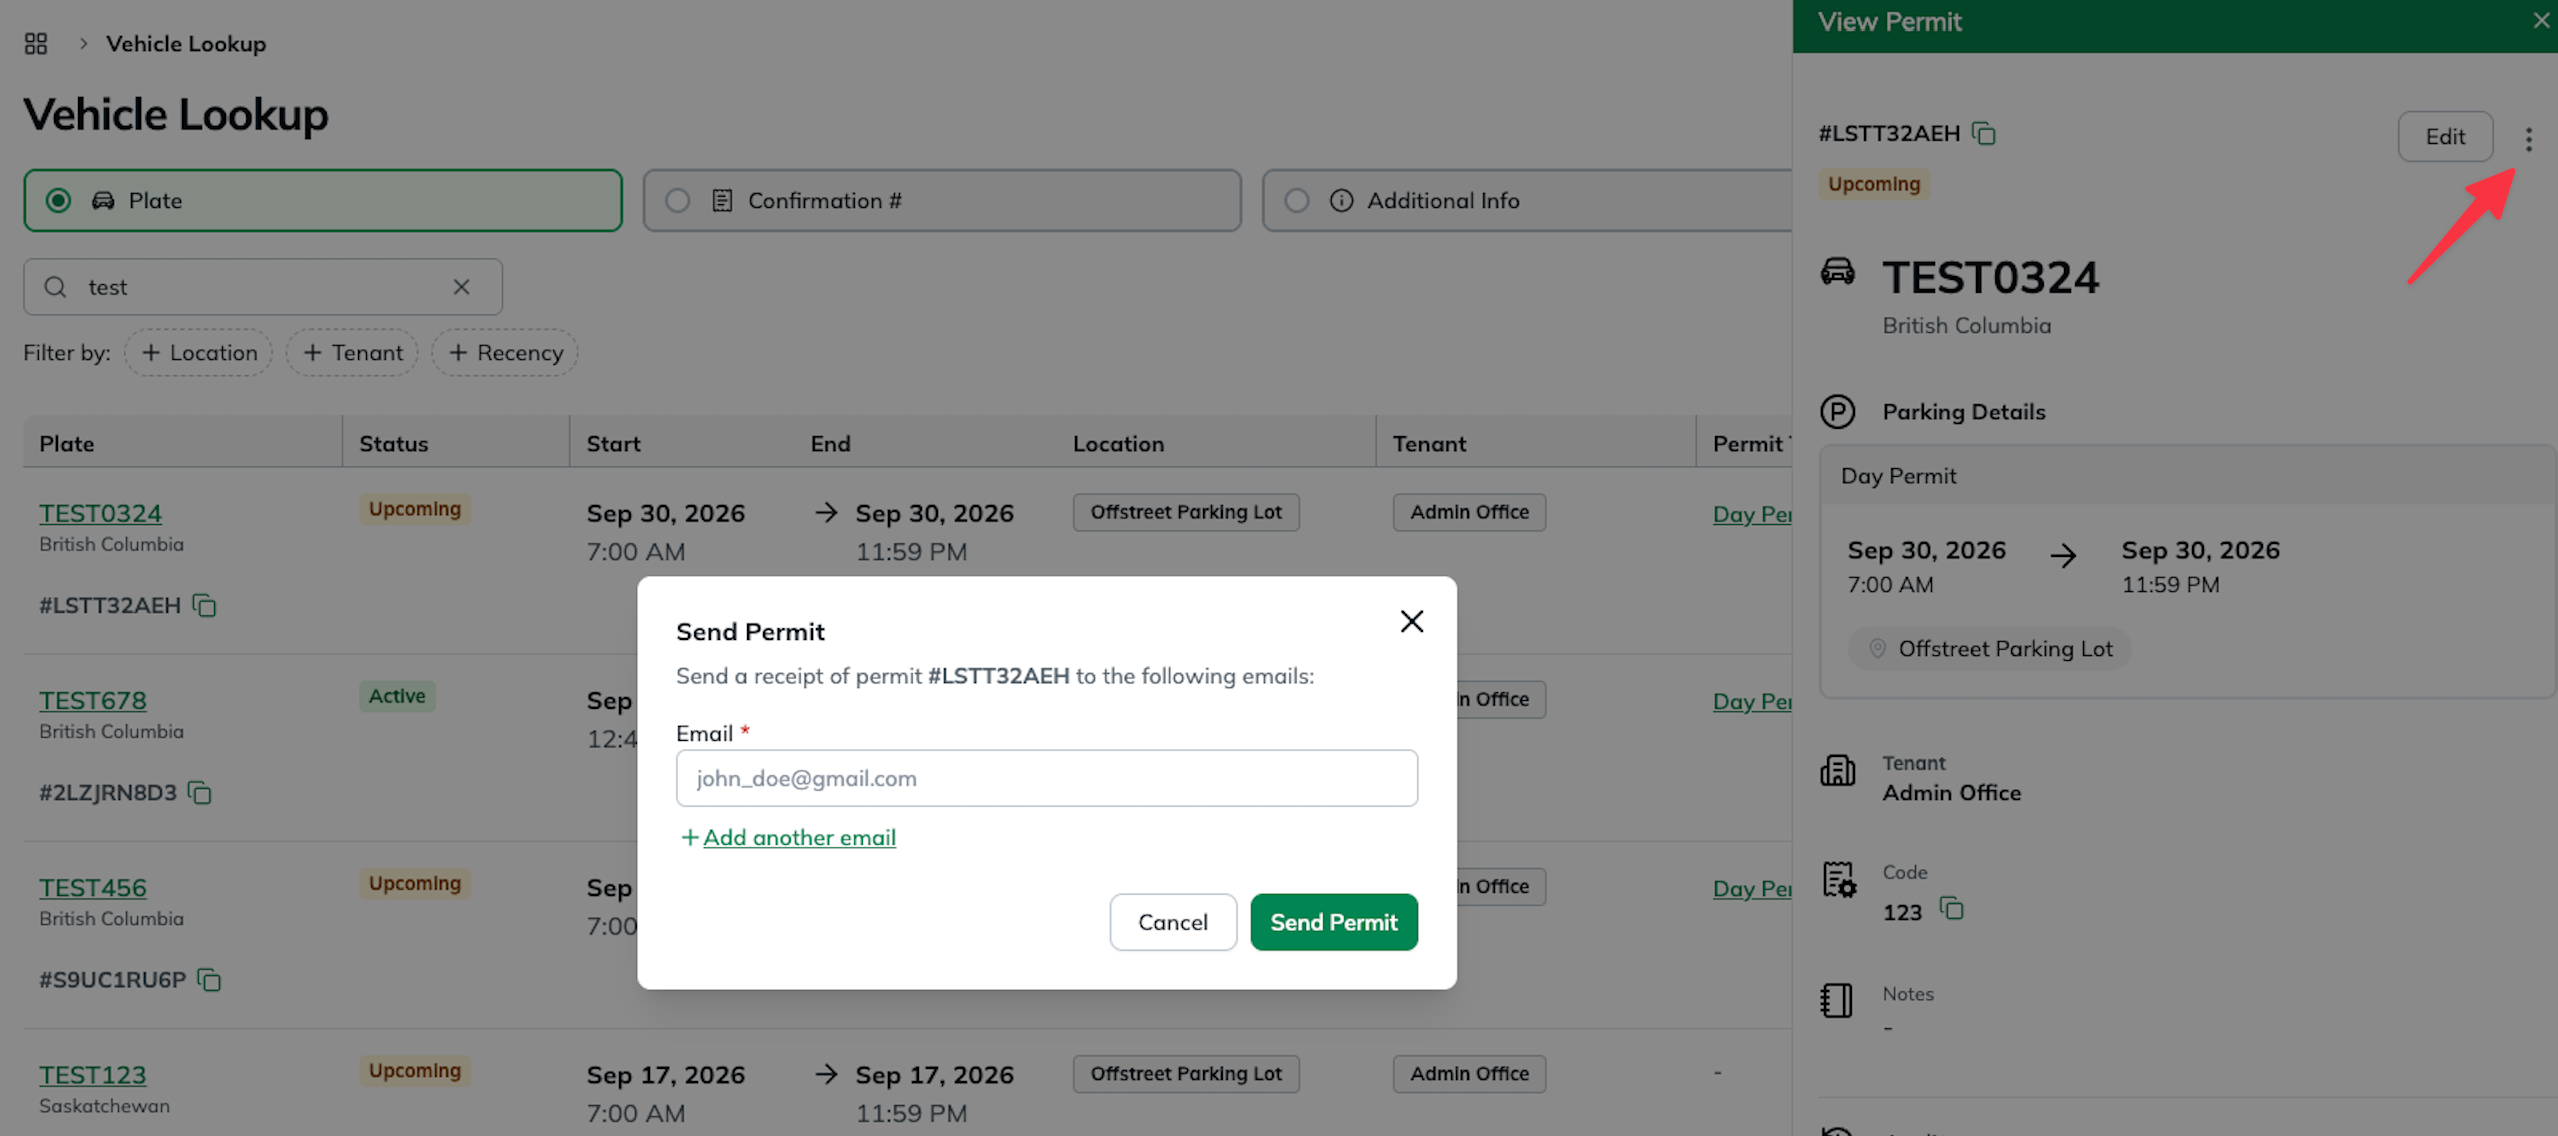
With Permits, the confirmation option is available from the three-dot menu (⋮) in the View Permit panel.
- Open the permit.
- Click the three-dot menu (⋮) in the top-right corner.
- Select Send Email.
- Enter the email address(es) where you would like the permit confirmation sent.
Viewing Audit History
Previously, Registration Details included a separate Audit button.
With Permits, you don't need to open a separate Audit screen. The permit's Audit section is displayed directly within the View Permit panel.
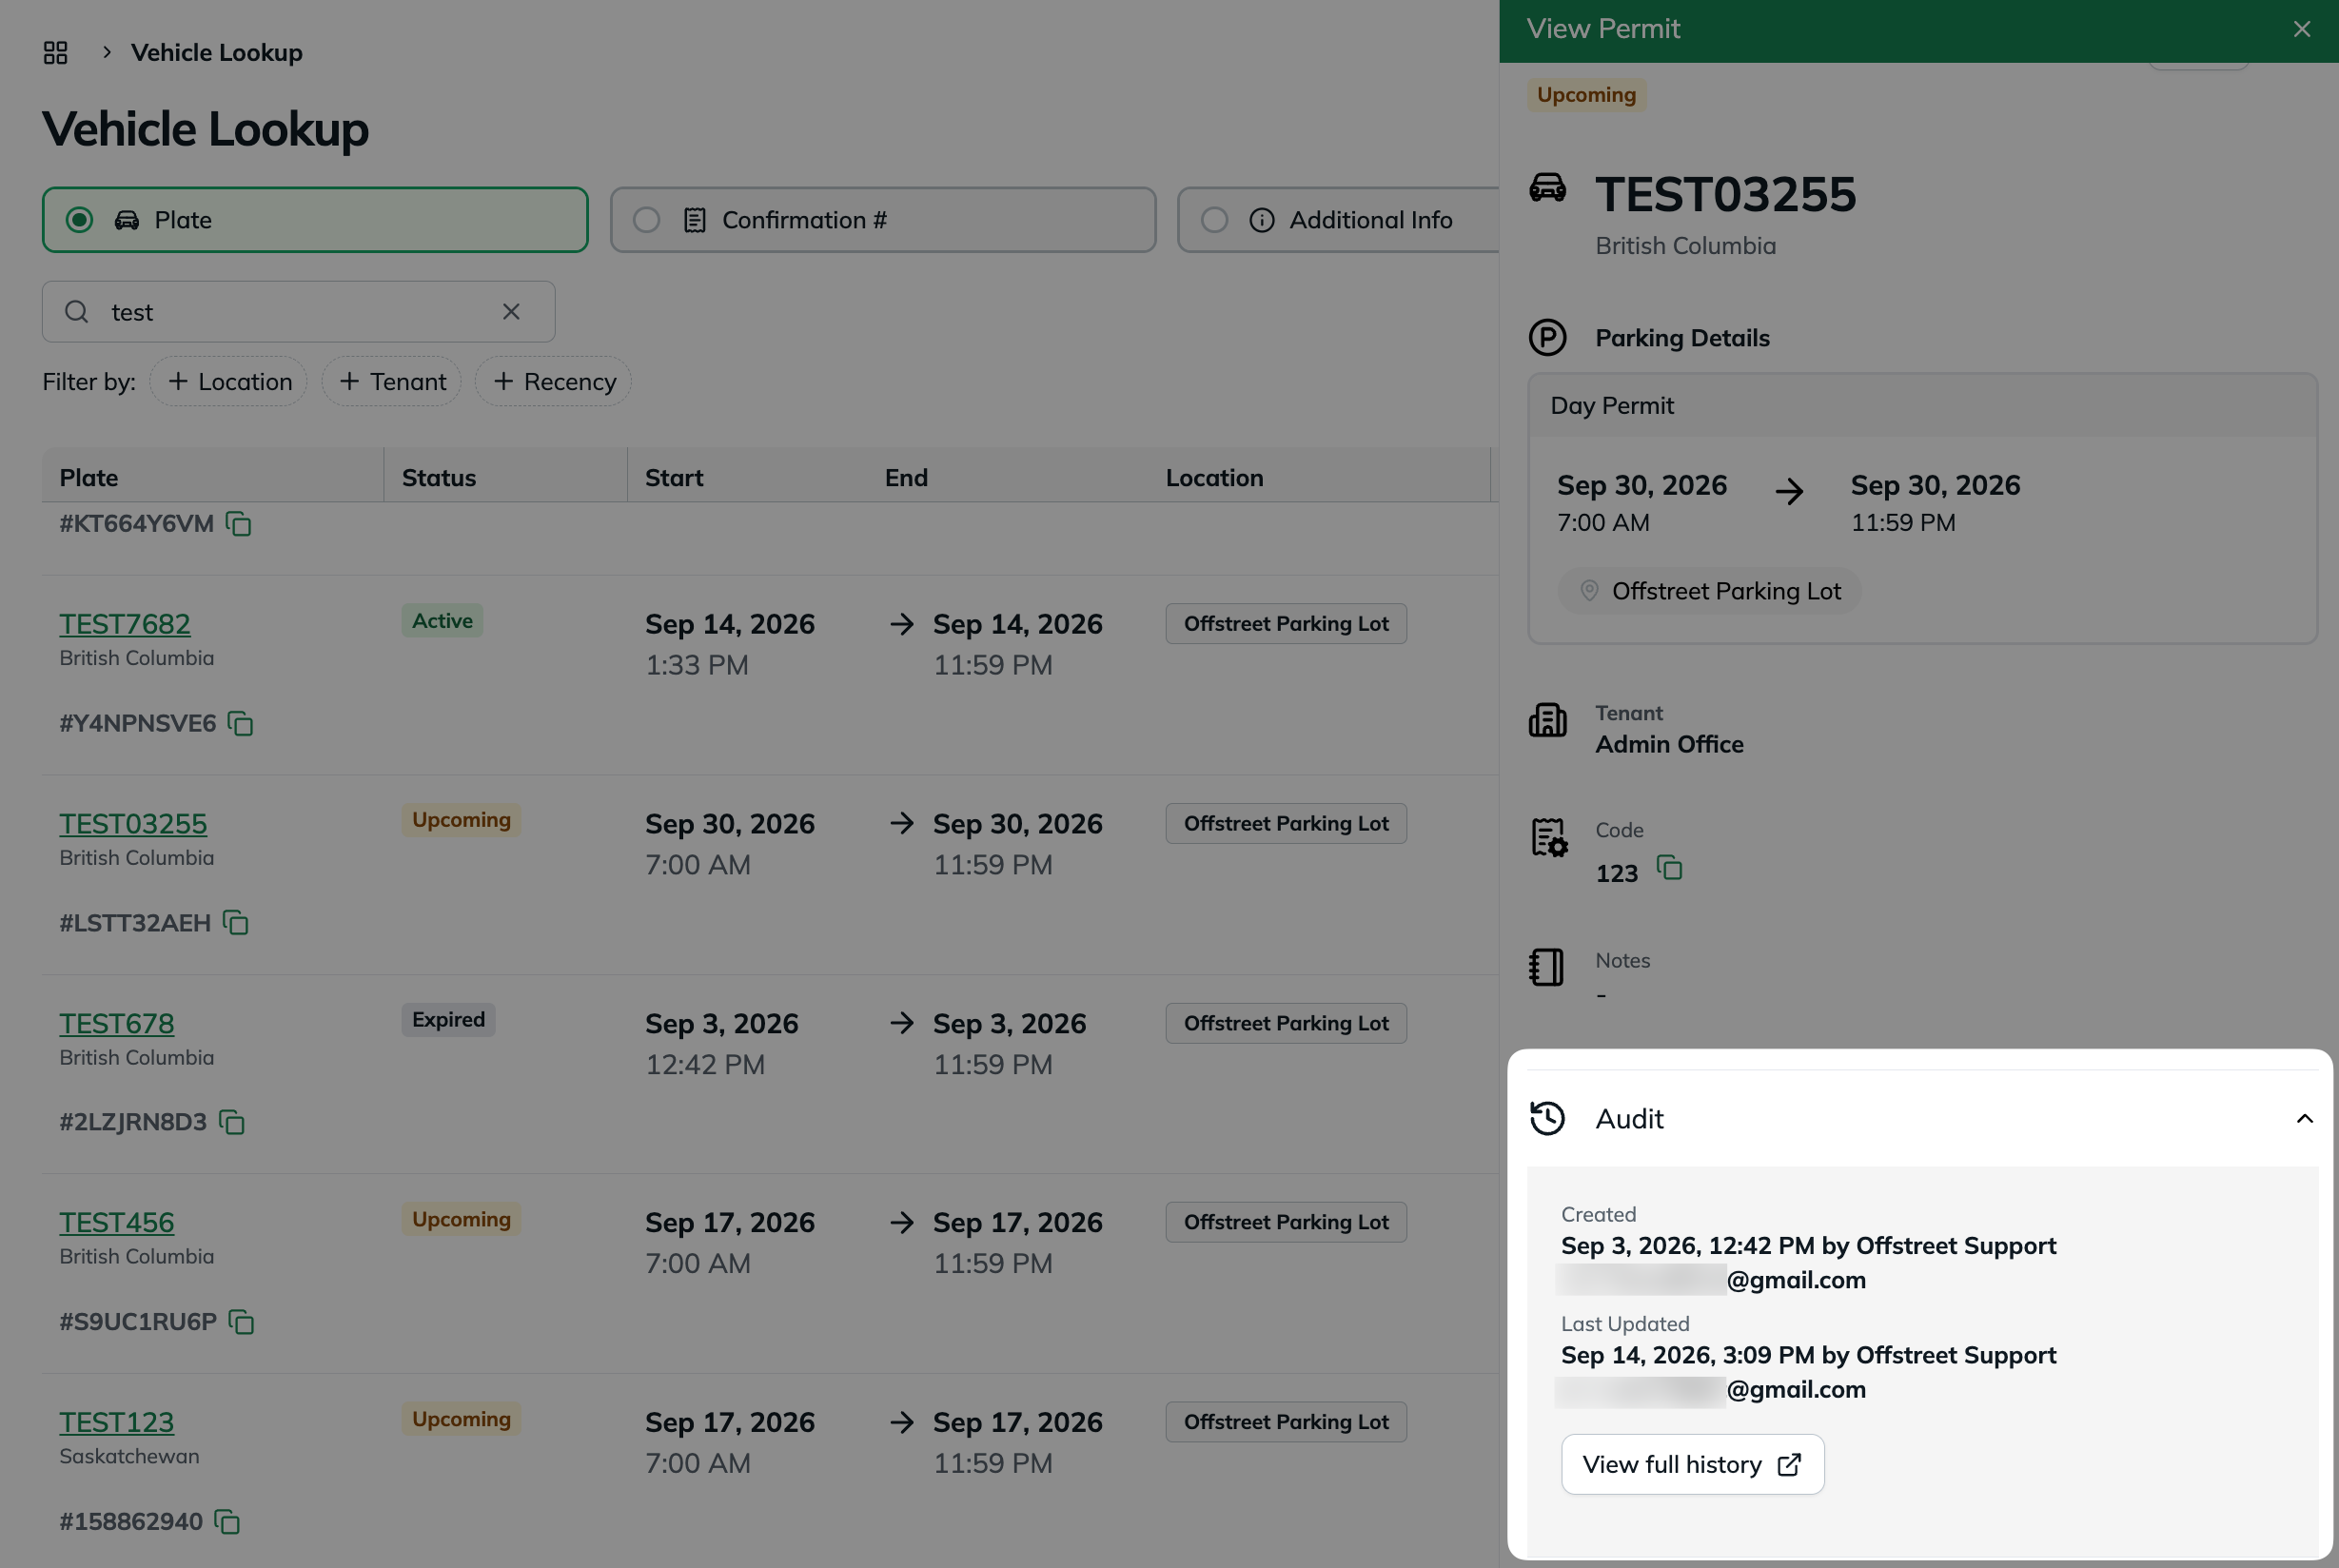
This section provides quick information such as when the permit was created or updated and who performed the action. Select View full history when you need full audit details.
Reporting
Reporting is also transitioning to Permits.
The Registration Report is now the Permit Report.
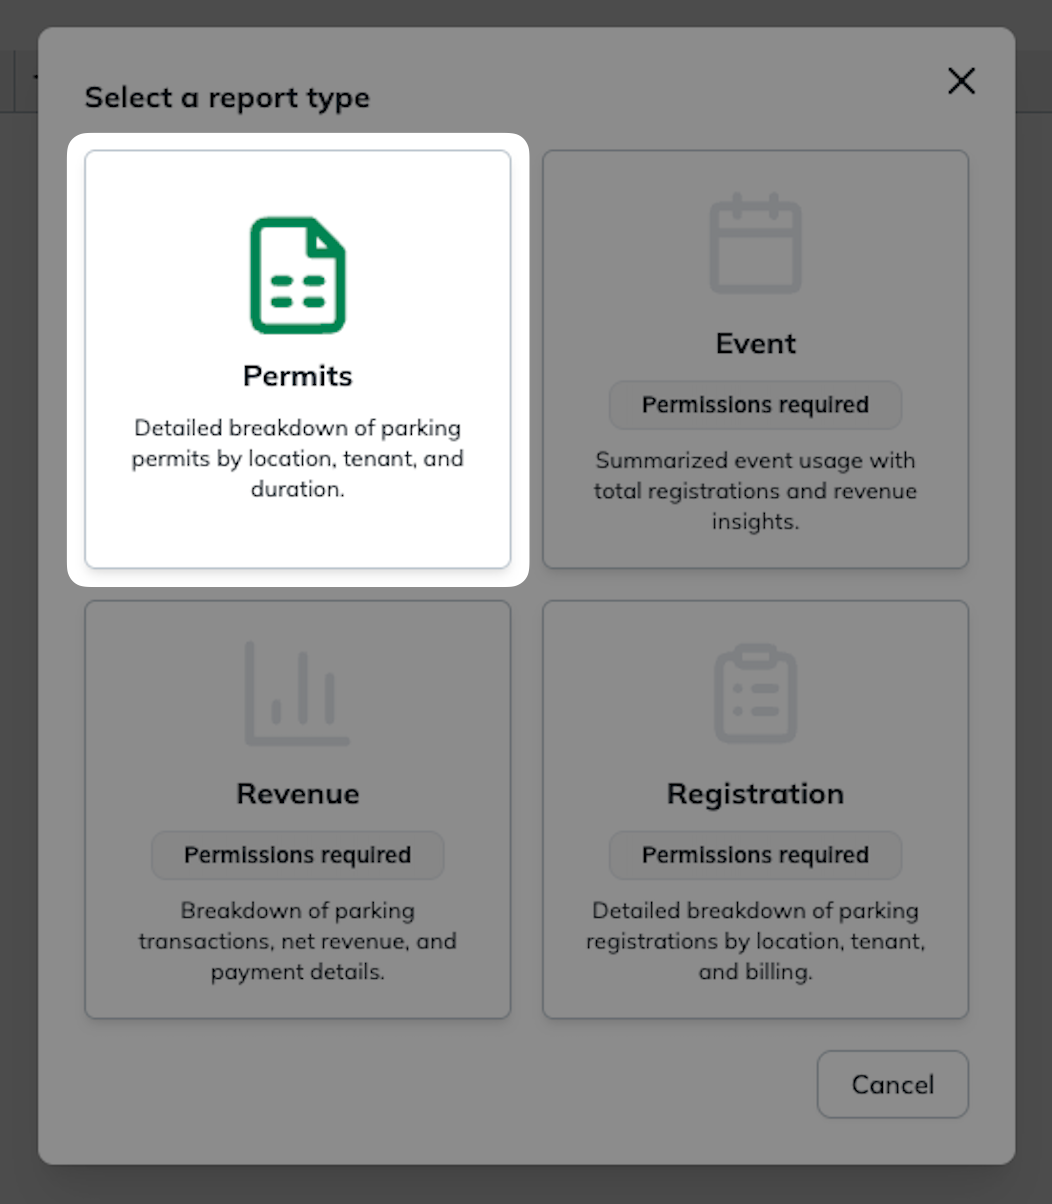
Use the Permit Report when you need to review or report on permits activity.
Vehicle Lookup & Active Vehicles
No major workflow change here.
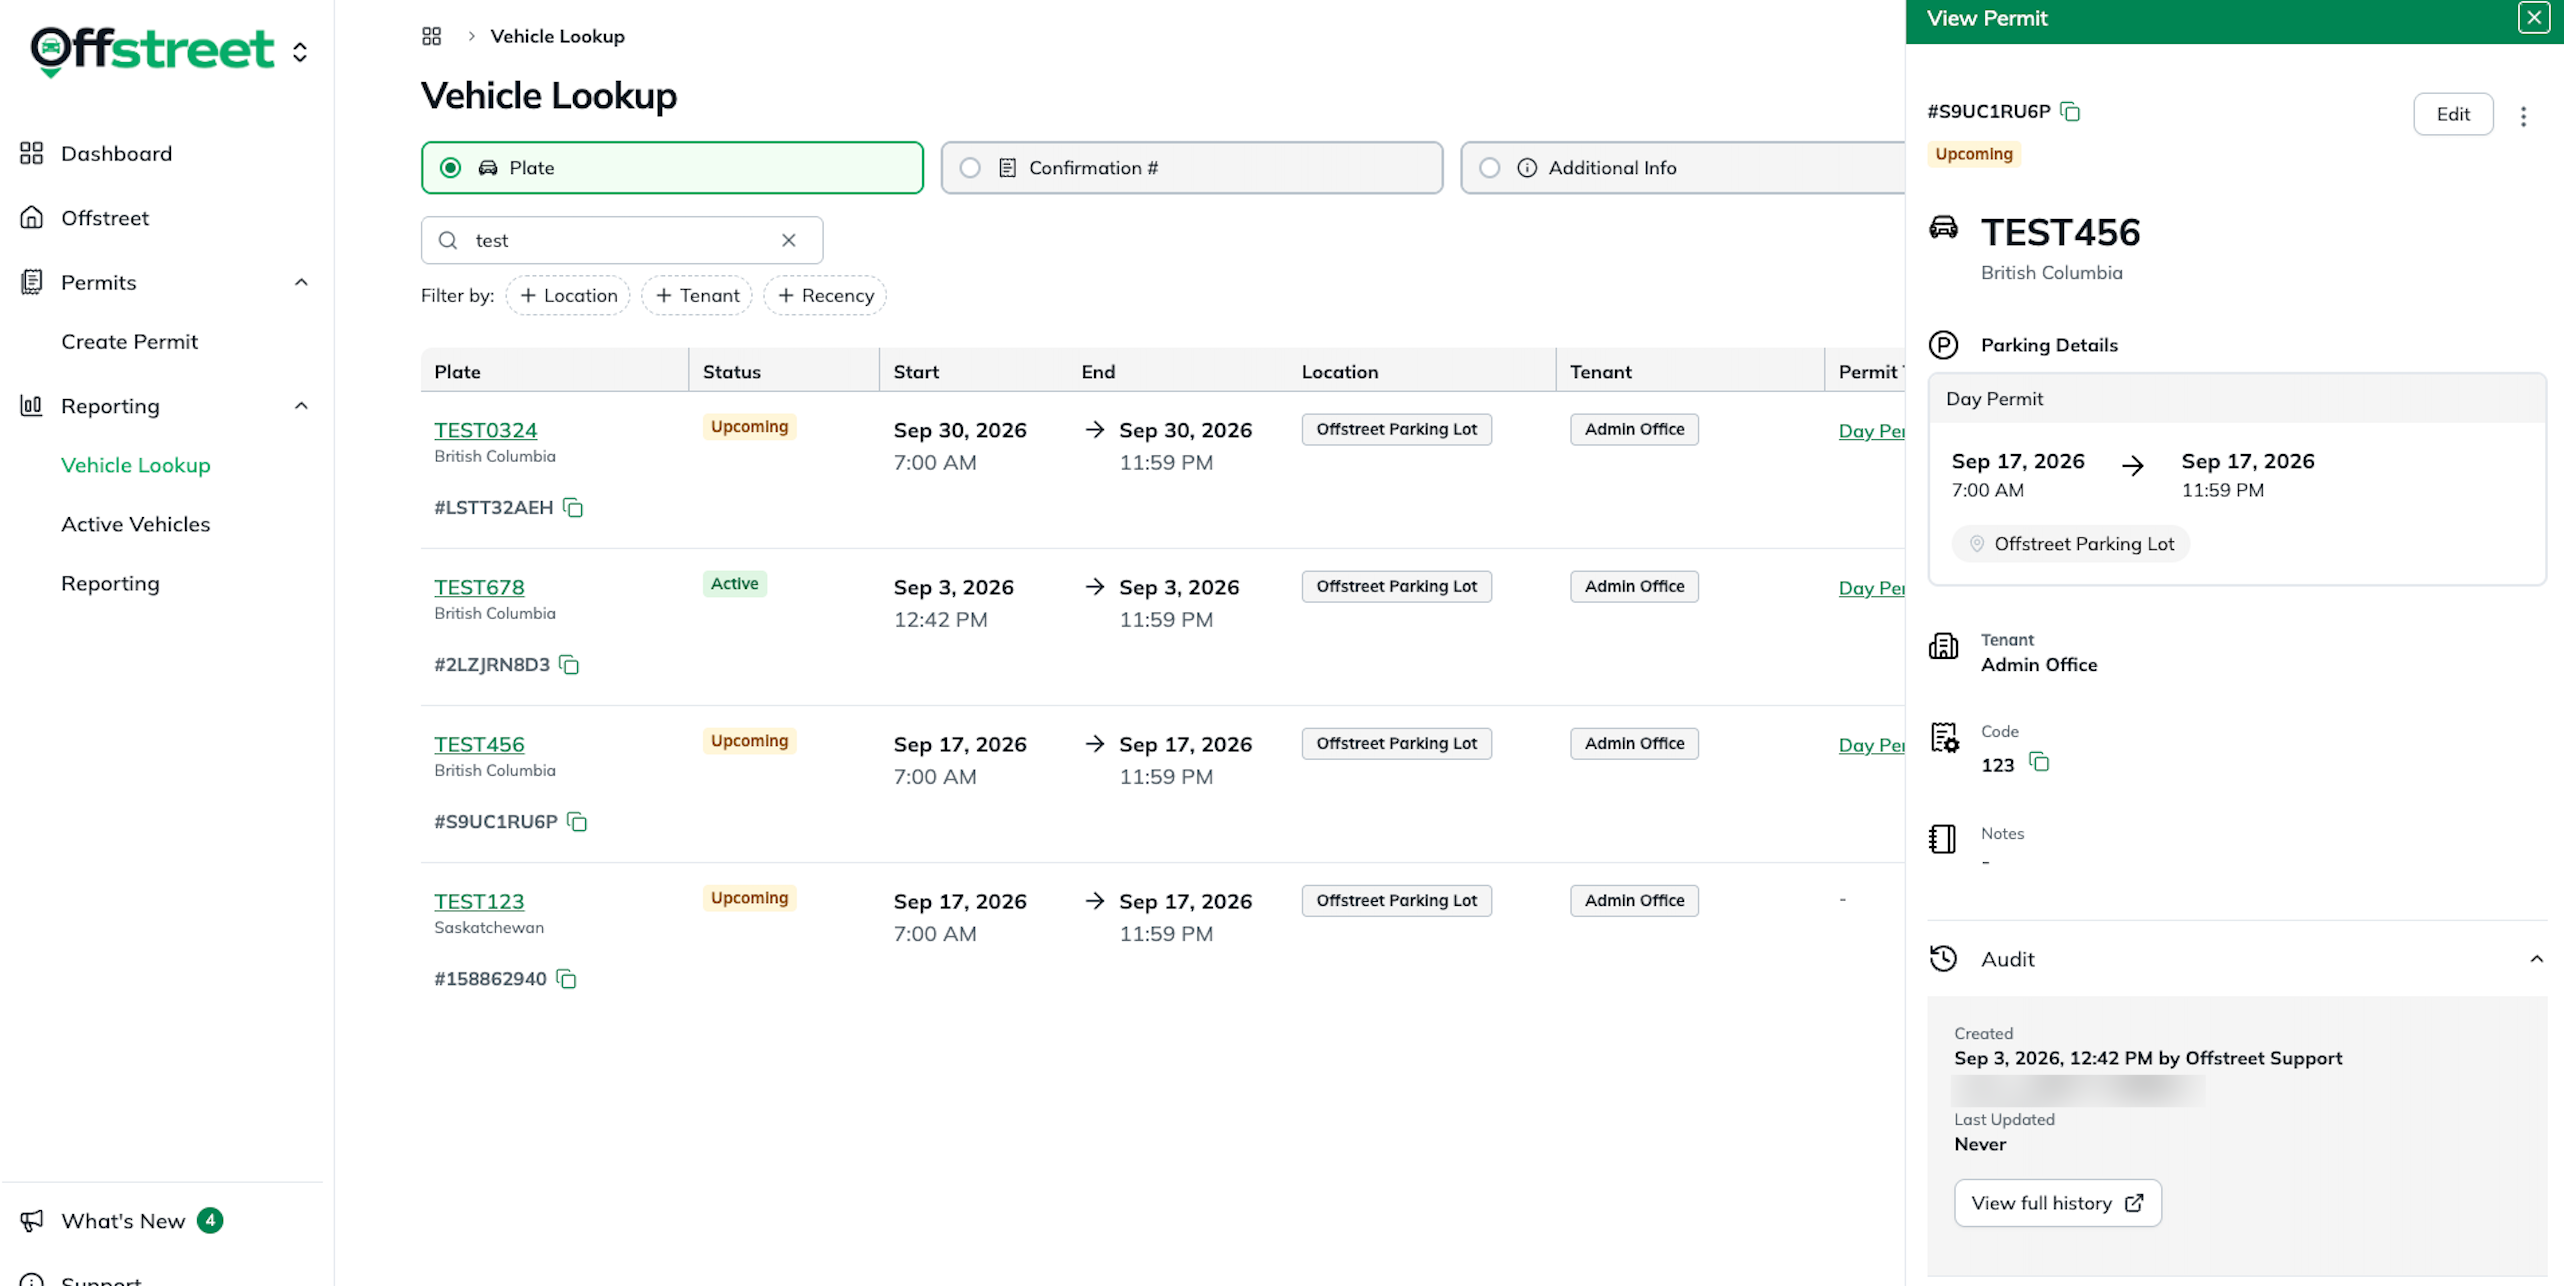
Vehicle Lookup and Active Vehicles remain available and can continue to be used to find vehicles and review parking activity as you do today.
Quick Reference
The easiest way to think about the transition is:
Registrations are now Permits.
You will see updated terminology and a refreshed Dashboard experience, but the tasks you perform remain largely the same:
- Create Registration → Create Permit
- View Registration → View Permit
- Edit → Edit
- Cancel Registration → Delete Permit
- Send Receipt → Send Email
- Audit button → Audit section within View Permit
- Registration Report → Permit Report
- Vehicle Lookup & Active Vehicles → remain the same
Your organization's parking team will continue to determine which parking options, locations, and actions are available to your account.
Was this article helpful?
That’s Great!
Thank you for your feedback
Sorry! We couldn't be helpful
Thank you for your feedback
Feedback sent
We appreciate your effort and will try to fix the article